Appearance
Specifications, use cases
Some marketplaces reached out to us with interesting use cases.
Sell digital assets
1. Create a file specification
You can request vendors to add a file of any type to their product by adding a specification Short text, then change the Style to file.

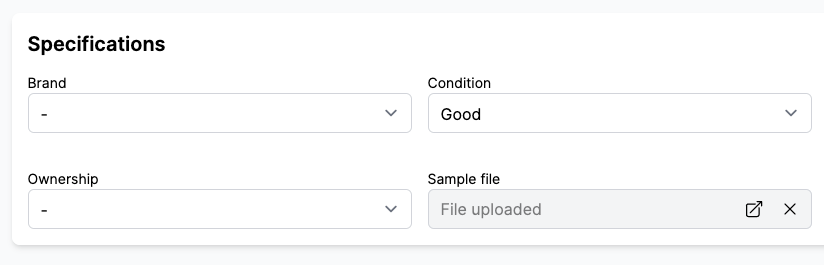
2. Create a product
Vendors can upload a file when creating a product in Add products > Specifications:
Once the product is published, you can access the URL of the file in Shopify > Products > (your product) > Metafields. Programmically, you can use the metafield reference in your theme.
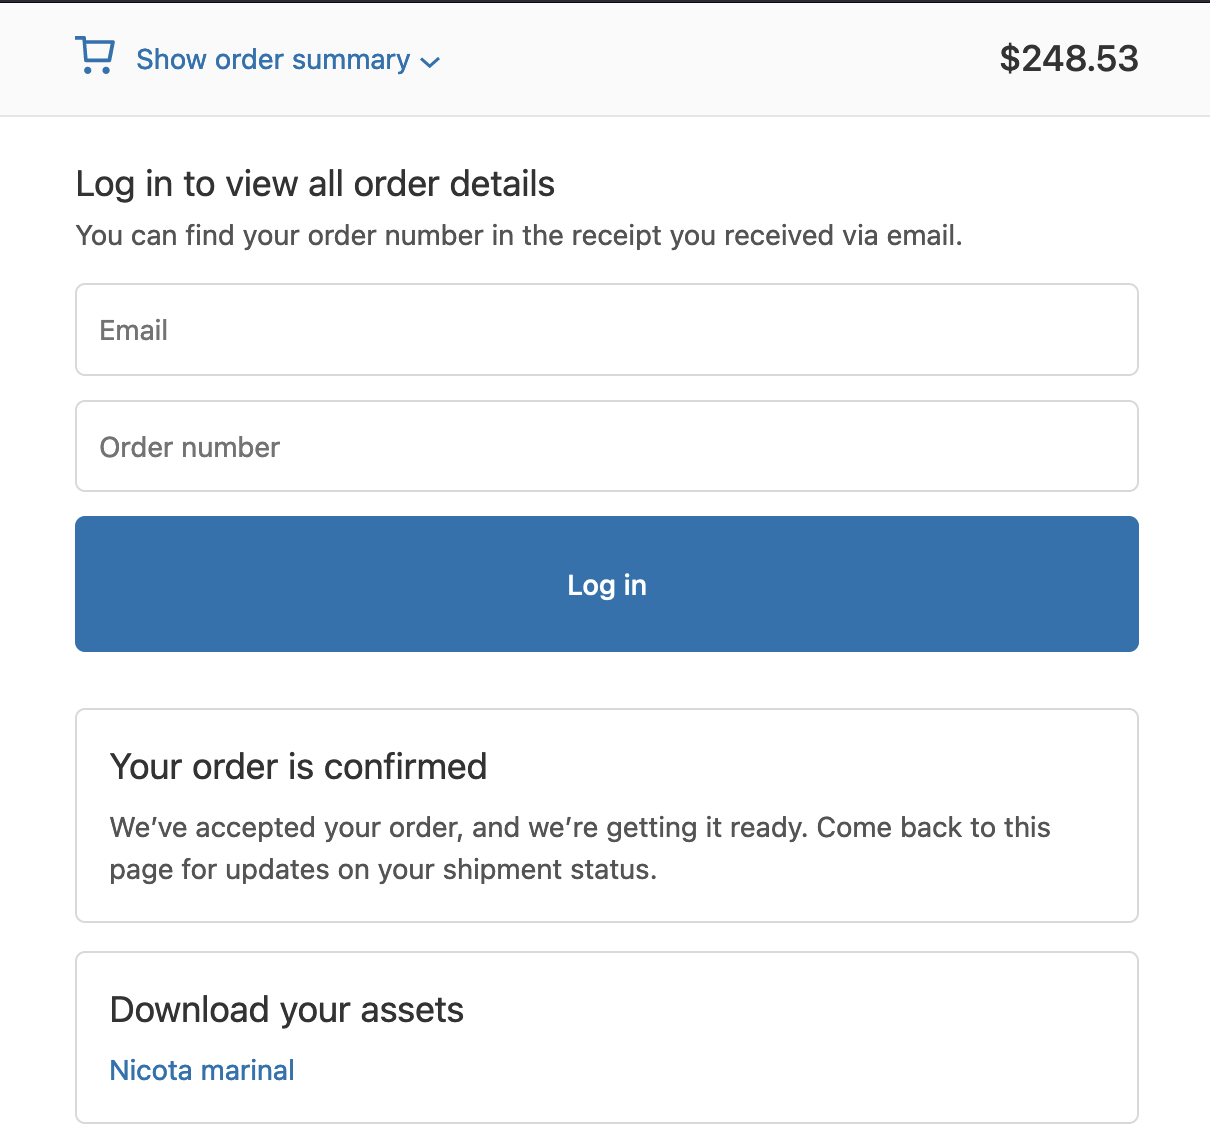
3. Asset download link on the checkout page
Following Shopify > Settings > Checkout > Order status page > Additional script, the marketplace can add a script to add a list of downloadable assets.
See the code
liquid
<script defer>
  // Garnet script to display the downloadable assets to the checkout page
  function addSection() {
    {% assign metafield_key = 'download_link' %} // ⚠️ Change the name of the metafield key
    const firstNode = document.querySelector('.section .content-box:first-child')
    const parent = firstNode.parentElement
    const newEl = firstNode.cloneNode(true);
    newEl.querySelector('h2').innerText = 'Download your assets'
    const content = newEl.querySelector('p')

    // Add links to content
    content.innerHTML = ''
    {% for line_item in order.line_items %}
    {% assign asset_url = line_item.product.metafields.custom[metafield_key] %}
    {% if asset_url %}
    content.innerHTML +=
      `<div>
          <a href="{{ asset_url }}" target="_blank">
            {{ line_item.product.title }}
          </a>
        </div>`
    {% endif %}
    {% endfor %}
    if (content.innerHTML === '') return console.log('No assets to display')

    parent.insertBefore(newEl, firstNode.nextSibling)
  }
  setTimeout(addSection, 500) // Defer is not enough , we arbitrary wait for the dom to render
</script>
Result
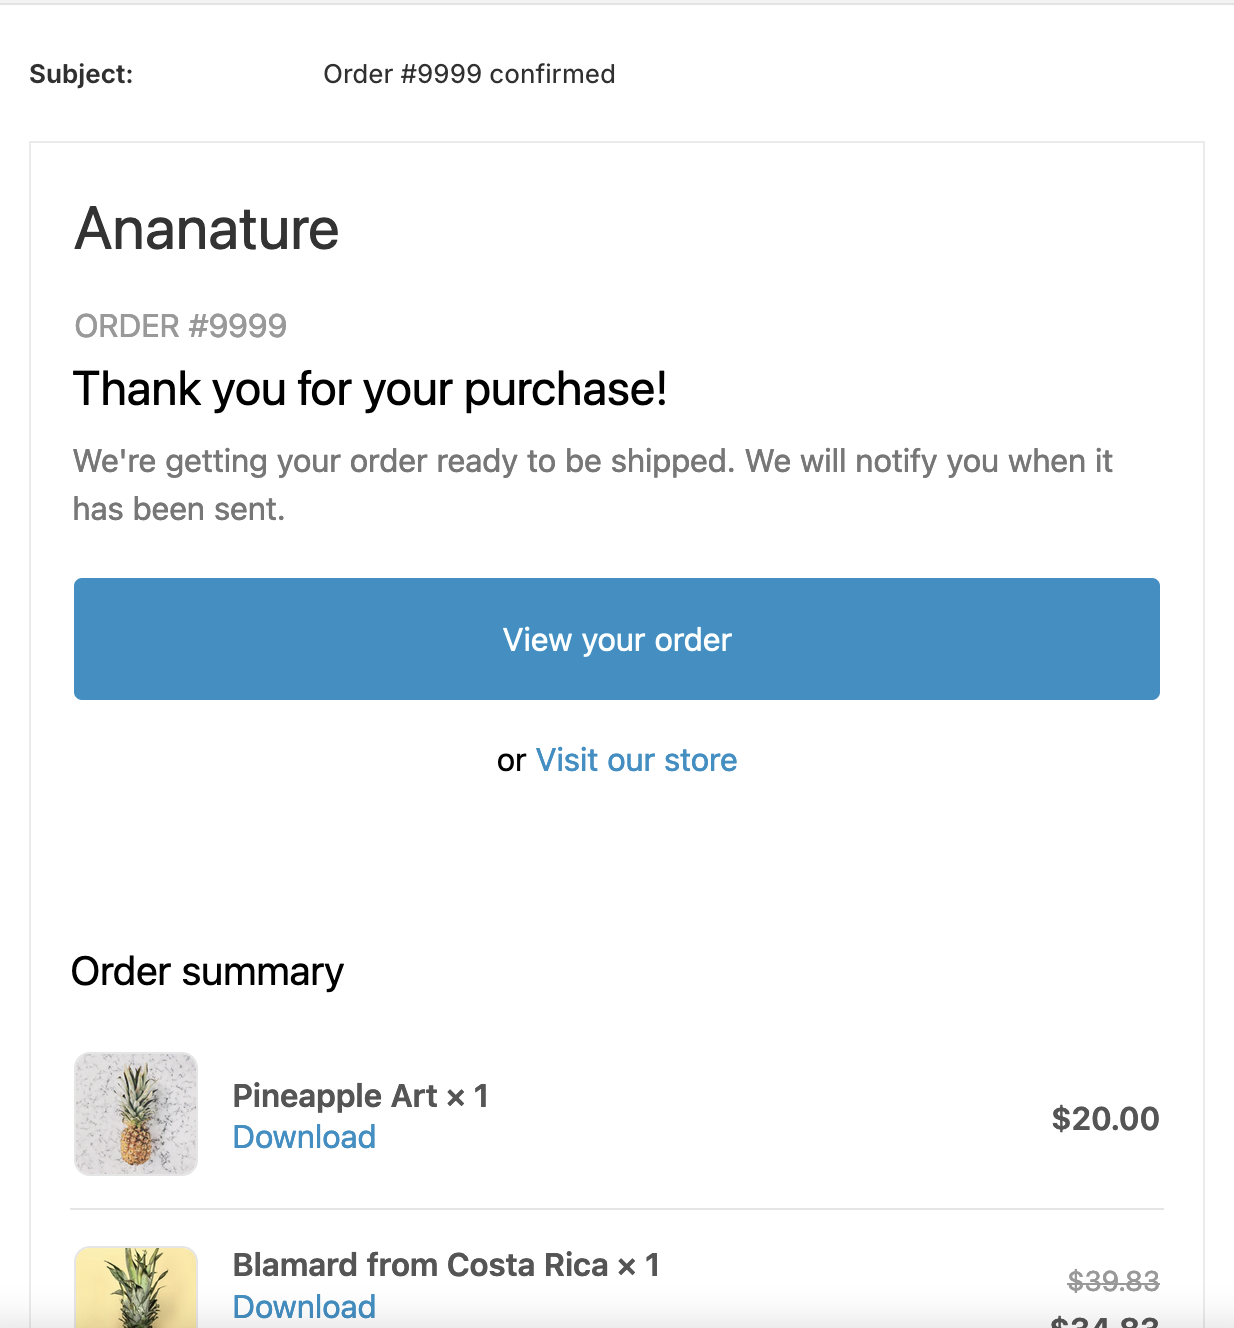
Asset download link on the confirmation email
Following Shopify > Settings > Notifications > Customer notifications > Order confirmation > Edit code, the marketplace can customise the order confirmation code and add the links of the assets
See the code
Locate the code next to the product title cell and use:
liquid
{% assign metafield_key = 'download_link' %} <!-- ⚠️ Change the name of the metafield key -->
{% assign asset_url = line.product.metafields.custom[metafield_key] %}
{% if asset_url %}
  <a href="{{ asset_url }}" target="_blank">Download</a>
{% endif %}
Result
Any issue?
Reach out to us if you need help from our developers.
Manage VAT rates & Tax overrides
Shopify enables the marketplace to create tax overrides and exemptions on specific collections.
In order to let the vendor choose the VAT rate of a product, the marketplace needs to create an automated collection based on a specification. This collection will be used in Shopify > Settings > Taxes and duties > (your country) > Tax rates and exemptions.