Appearance
eCommerce integrations
Garnet offers many integrations to integrate your vendor's eCommerce platform. All our integrations are in real time and tailor made to ensure that it is easy and fast for vendors to integrate their platform with the marketplace.
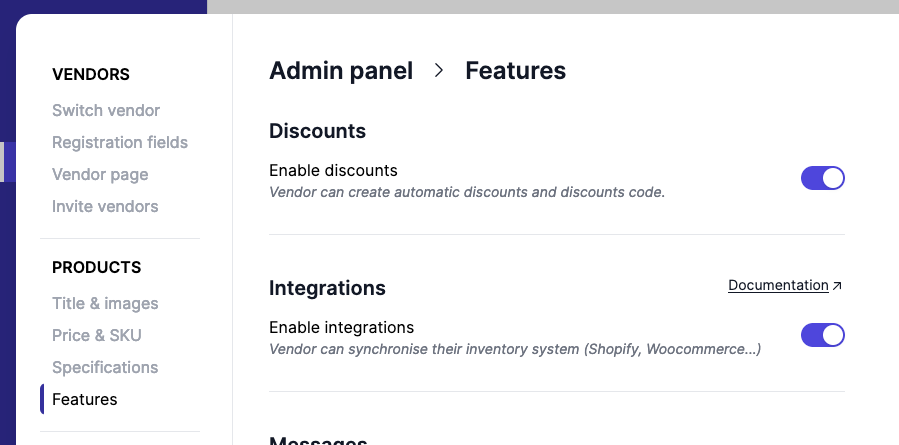
Integrations are available in Garnet > Settings > Integrations and is enabled by default.
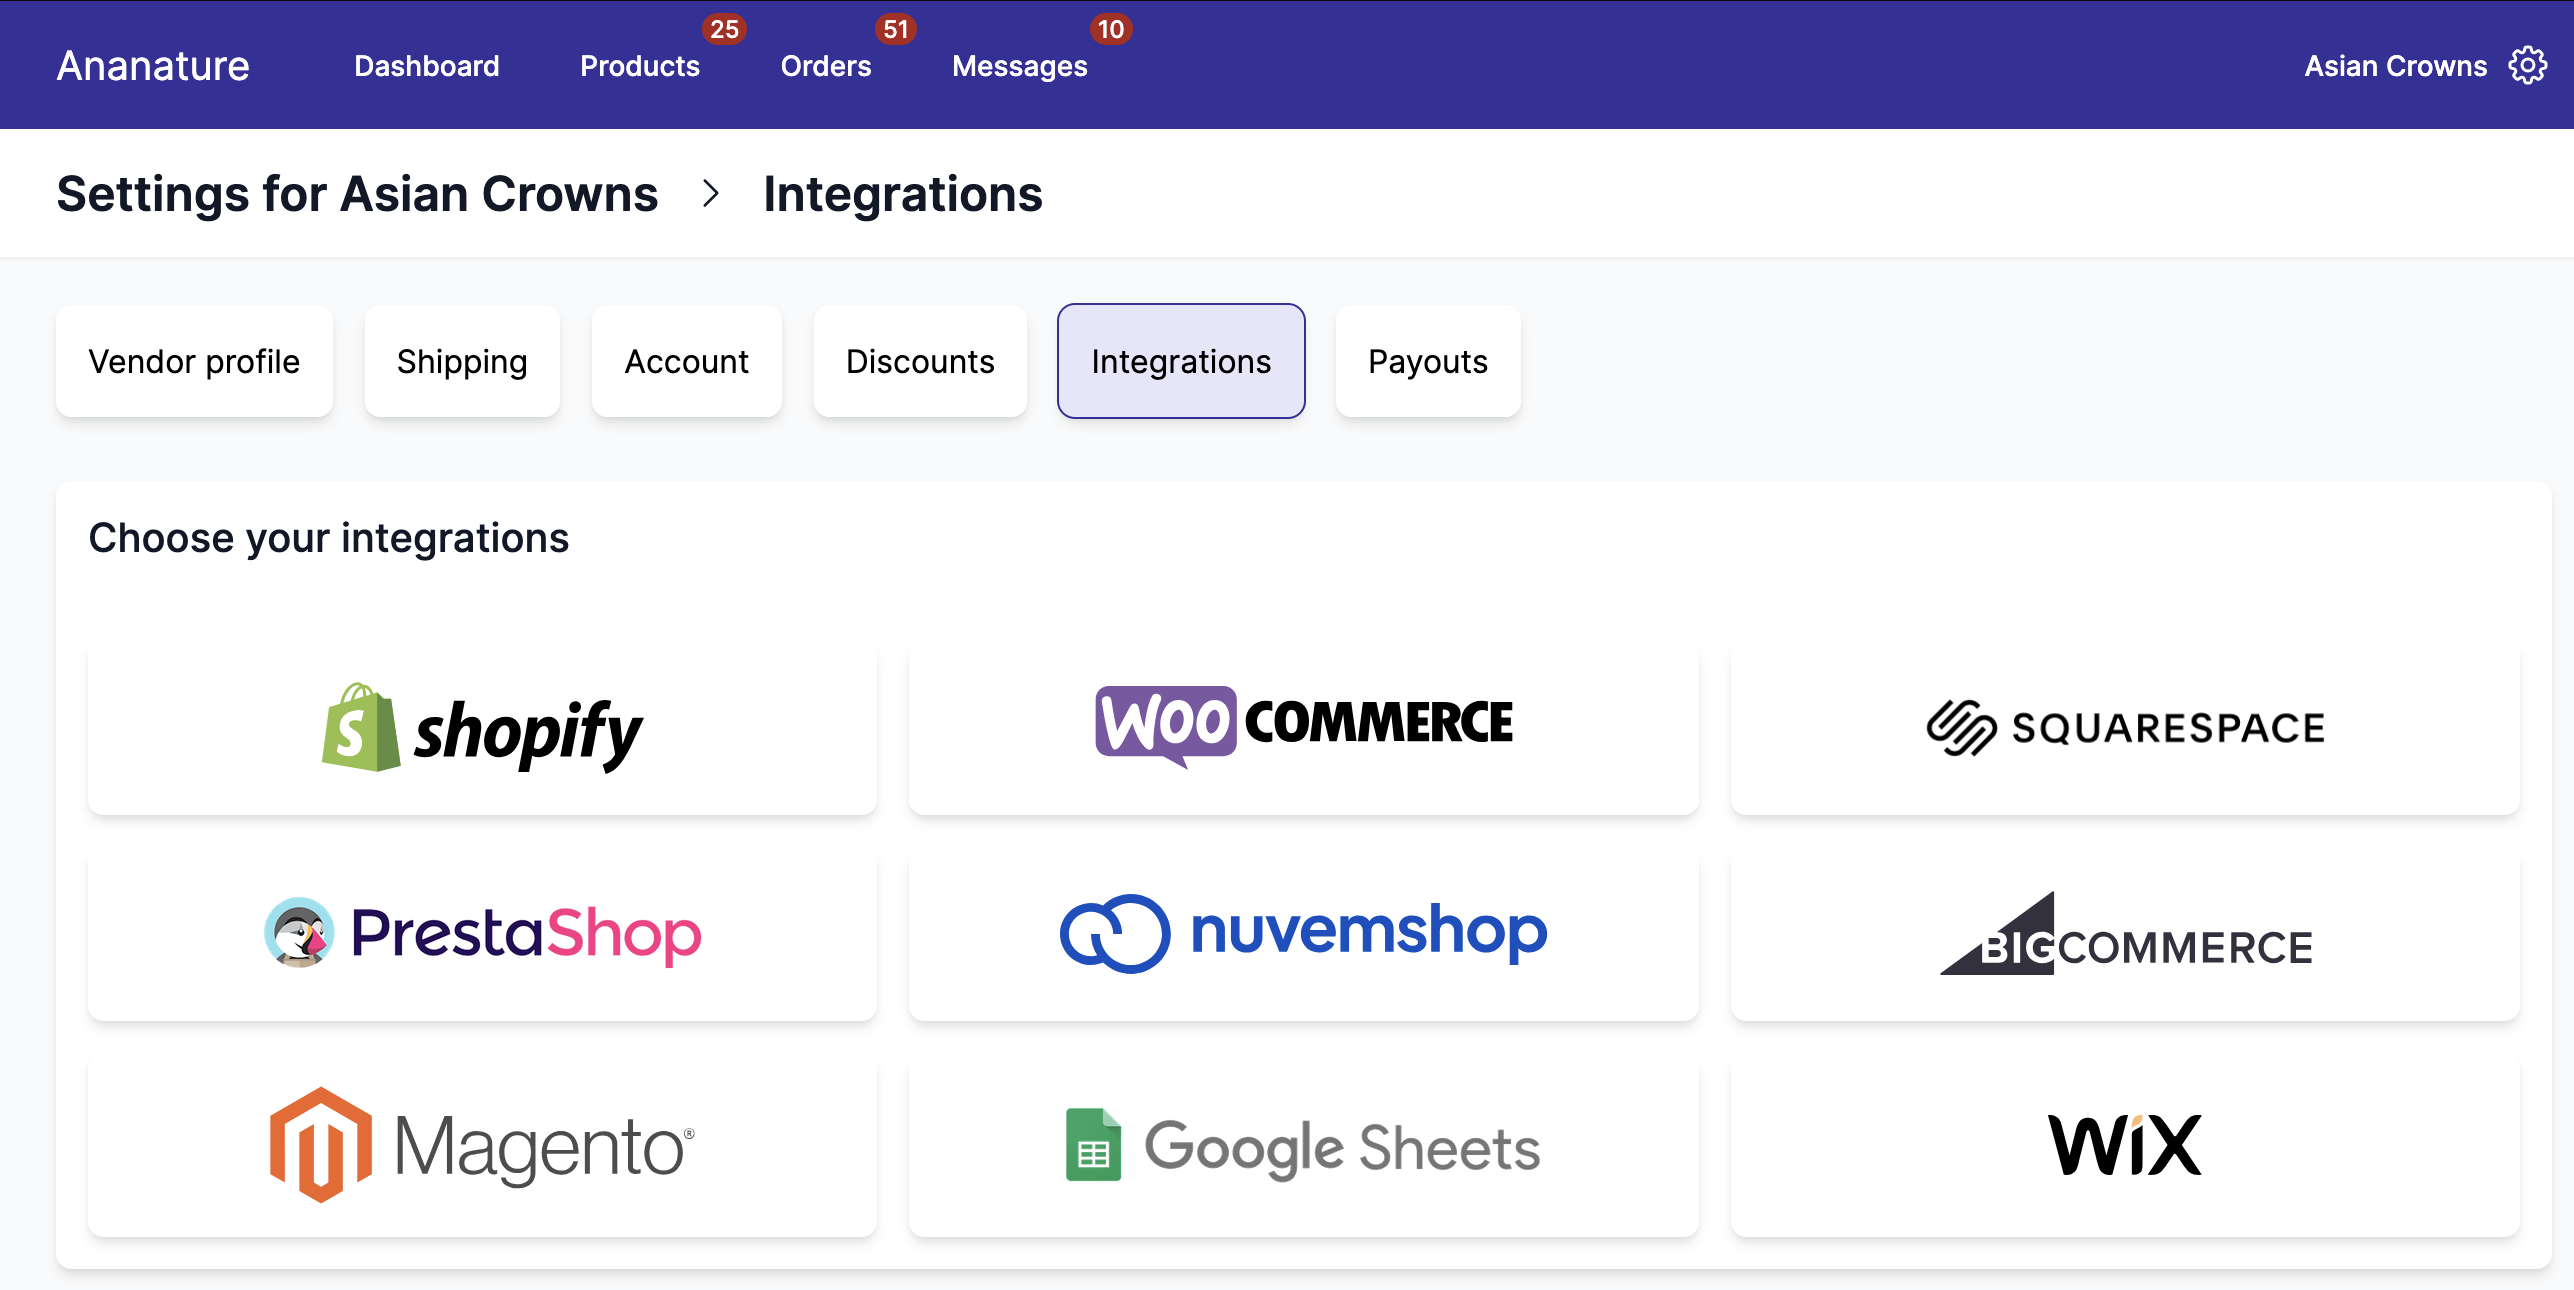
More integrations available can be configured
Navigate the other sections to learn more about them. All our integrations synchronise at least the products between the marketplace and the vendors, and some also synchronise the orders, tracking, and discounts codes.
Order synchronisation
Orders are only forwarded to the vendor's eCommerce platform once they are paid. Authorized (but unpaid) orders are not forwarded.
Integration settings
Once the integration is live, the vendor and the marketplace can configure what information is sent to the marketplace:
- Price transformation to transform the price with a flat fee, percentage, or both. This is useful if the vendor wants to increase their price to cover for the marketplace commission or to cover for shipping.
- Stock buffer to reserve a number of units from being sent to the marketplace. For example, a buffer of
2means the marketplace will always see 2 fewer units than the vendor's actual stock. - Full Synchronization will synchronise all products from the vendor to the marketplace. Title, description, images, price, compare price, SEO.
- Price and Stock Only will synchronise the price and stock. It is the default settings.
- Stock only, useful when the price on the marketplace can change arbitrarily.
- No product sync will stop all product synchronisation for this integration. Existing products on the marketplace are not affected, but no updates will be synced.
- Auto synchronise is enabled by default. When turned off the marketplace can select which product will be accepted in the marketplace.
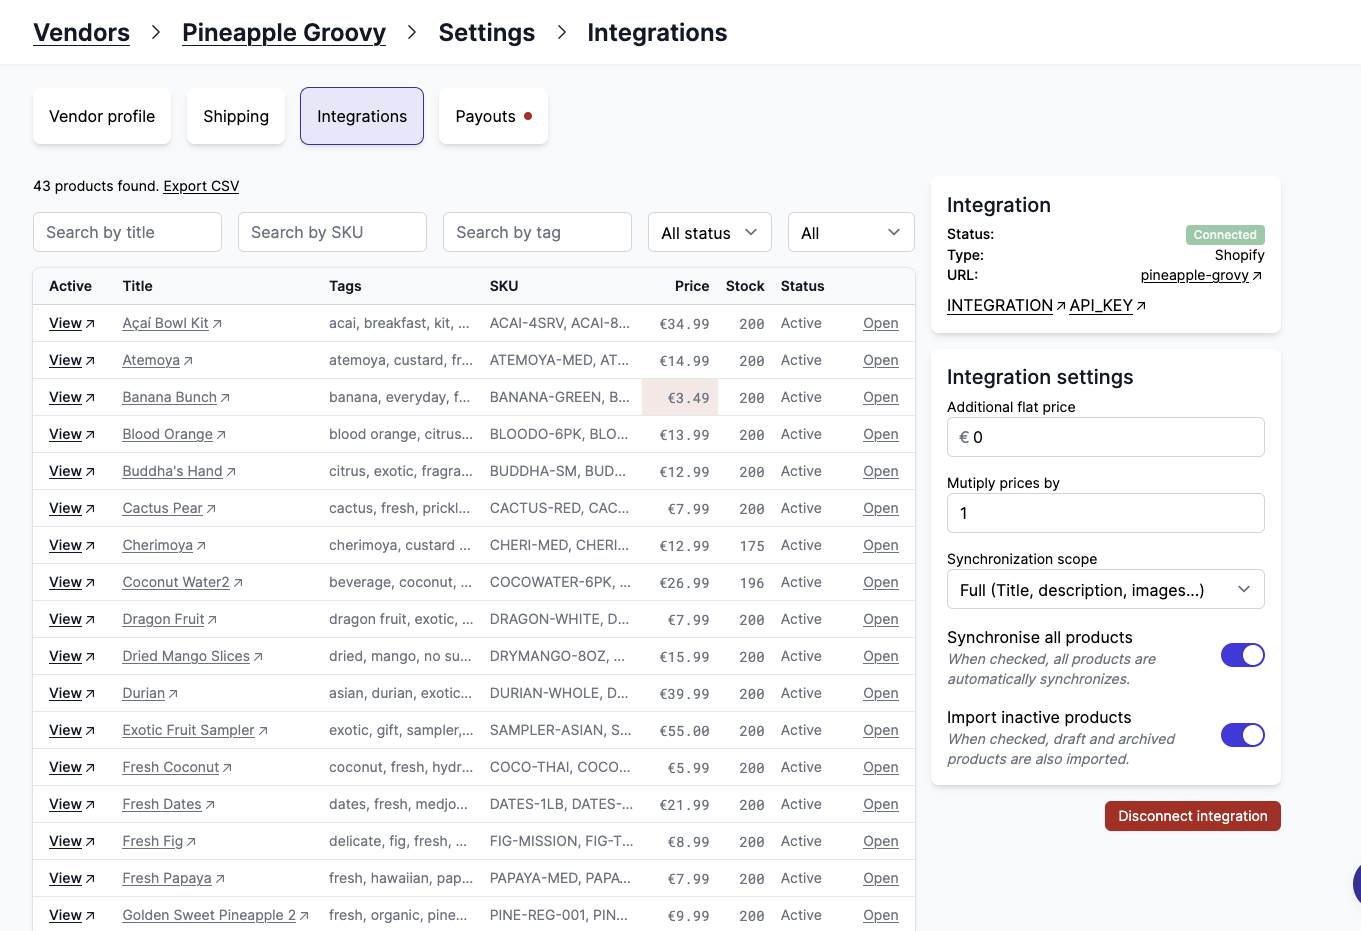
On the vendor list, the sync scope is indicated by dots below the integration icon. Three dots means full sync, two dots means price and stock only, one dot means stock only. When no product sync is active, the icon is displayed in black and white with no dots.
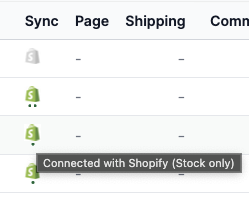
Synchronise specific products
When Auto synchronise is turned off, the user can select which products will be imported. It can then take several minutes for selected products for the changes to be active.
On this list you can see all products from the vendor's store and search by tag, title, SKU, and more. Based on the eCommerce platform, more search filters will be available.
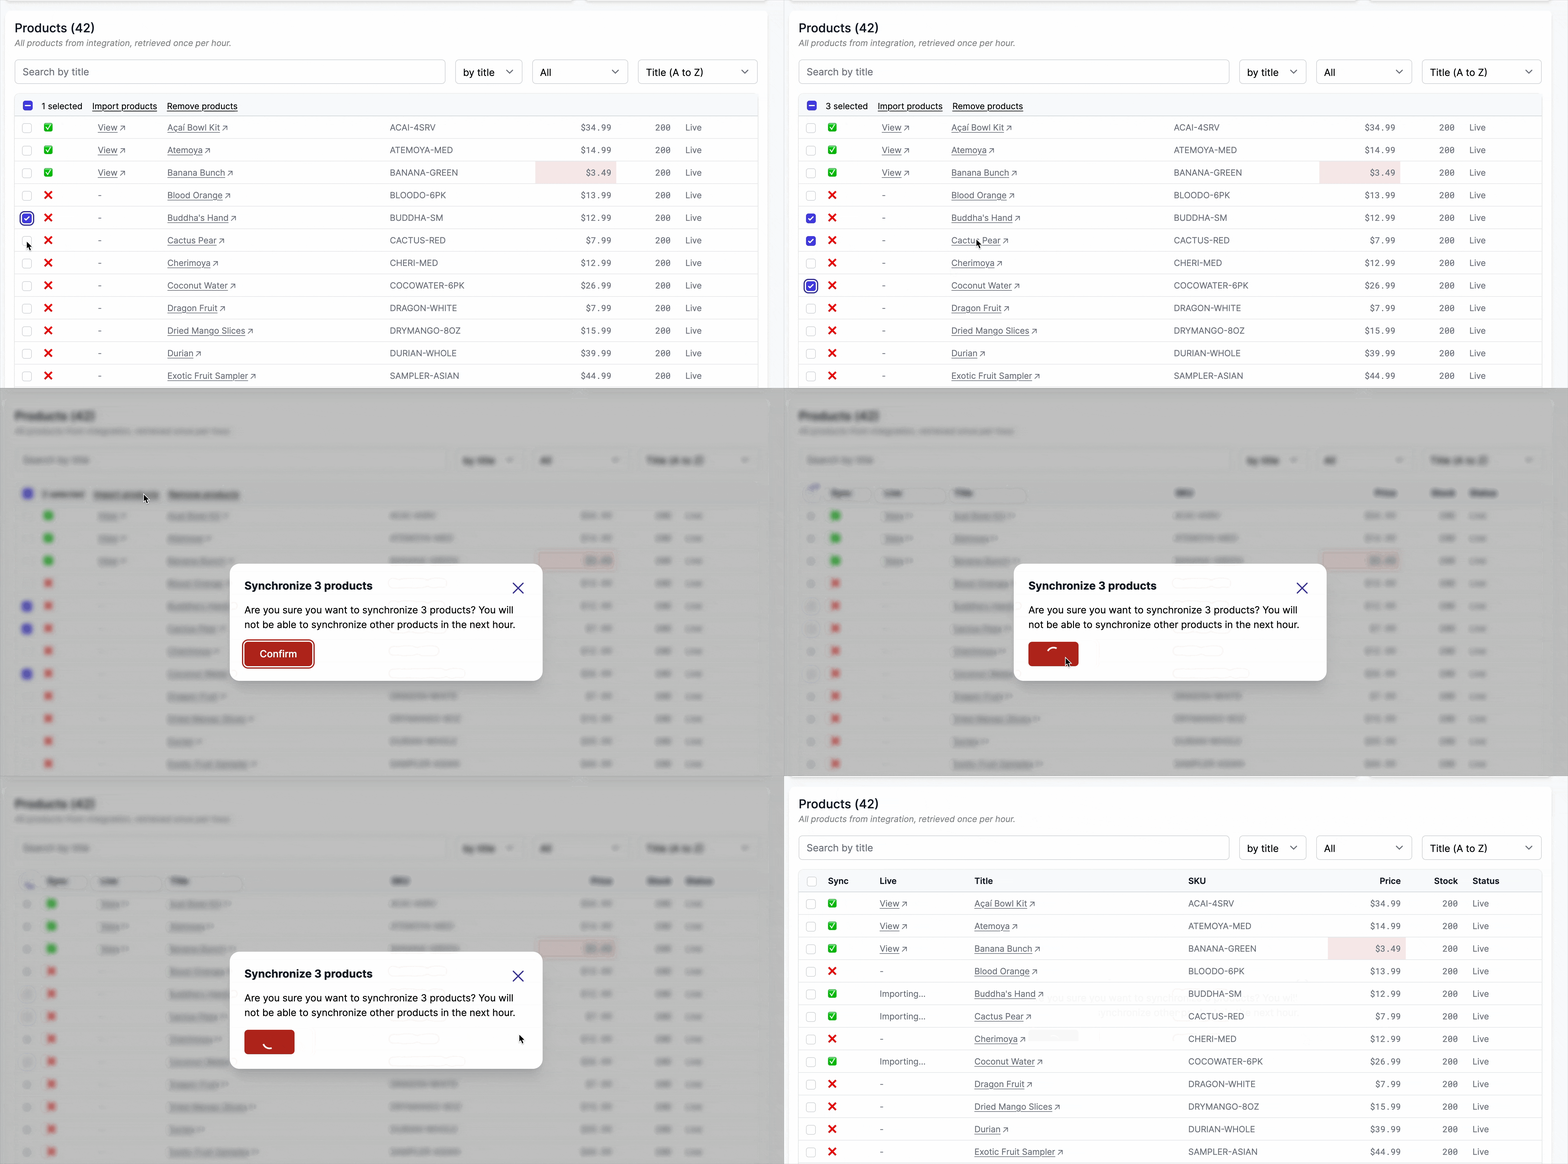
From this view, the user can also un-synchronize products. The products will be deleted from the marketplace.
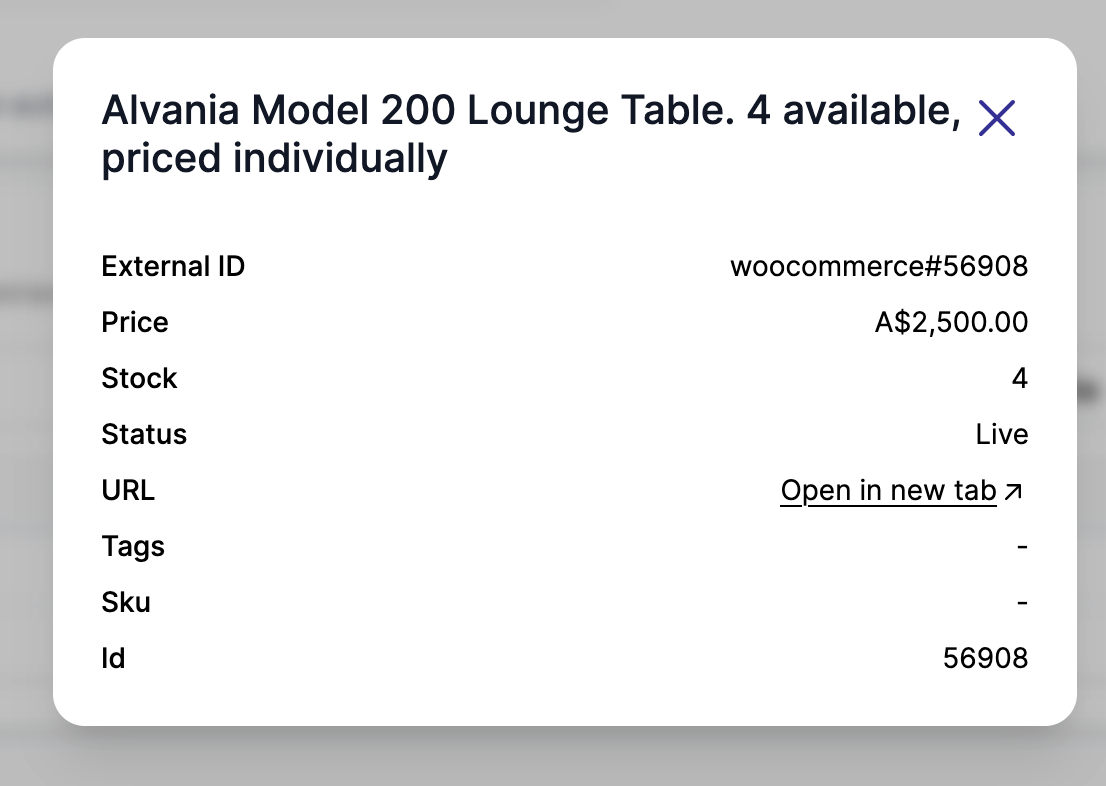
Click "Open" on any product to view all its details including external ID, price, stock, status, and all metadata fields.
When a row is highlighted in red, it means the product is either too cheap, out of stock, or not active.
View integration data on a product
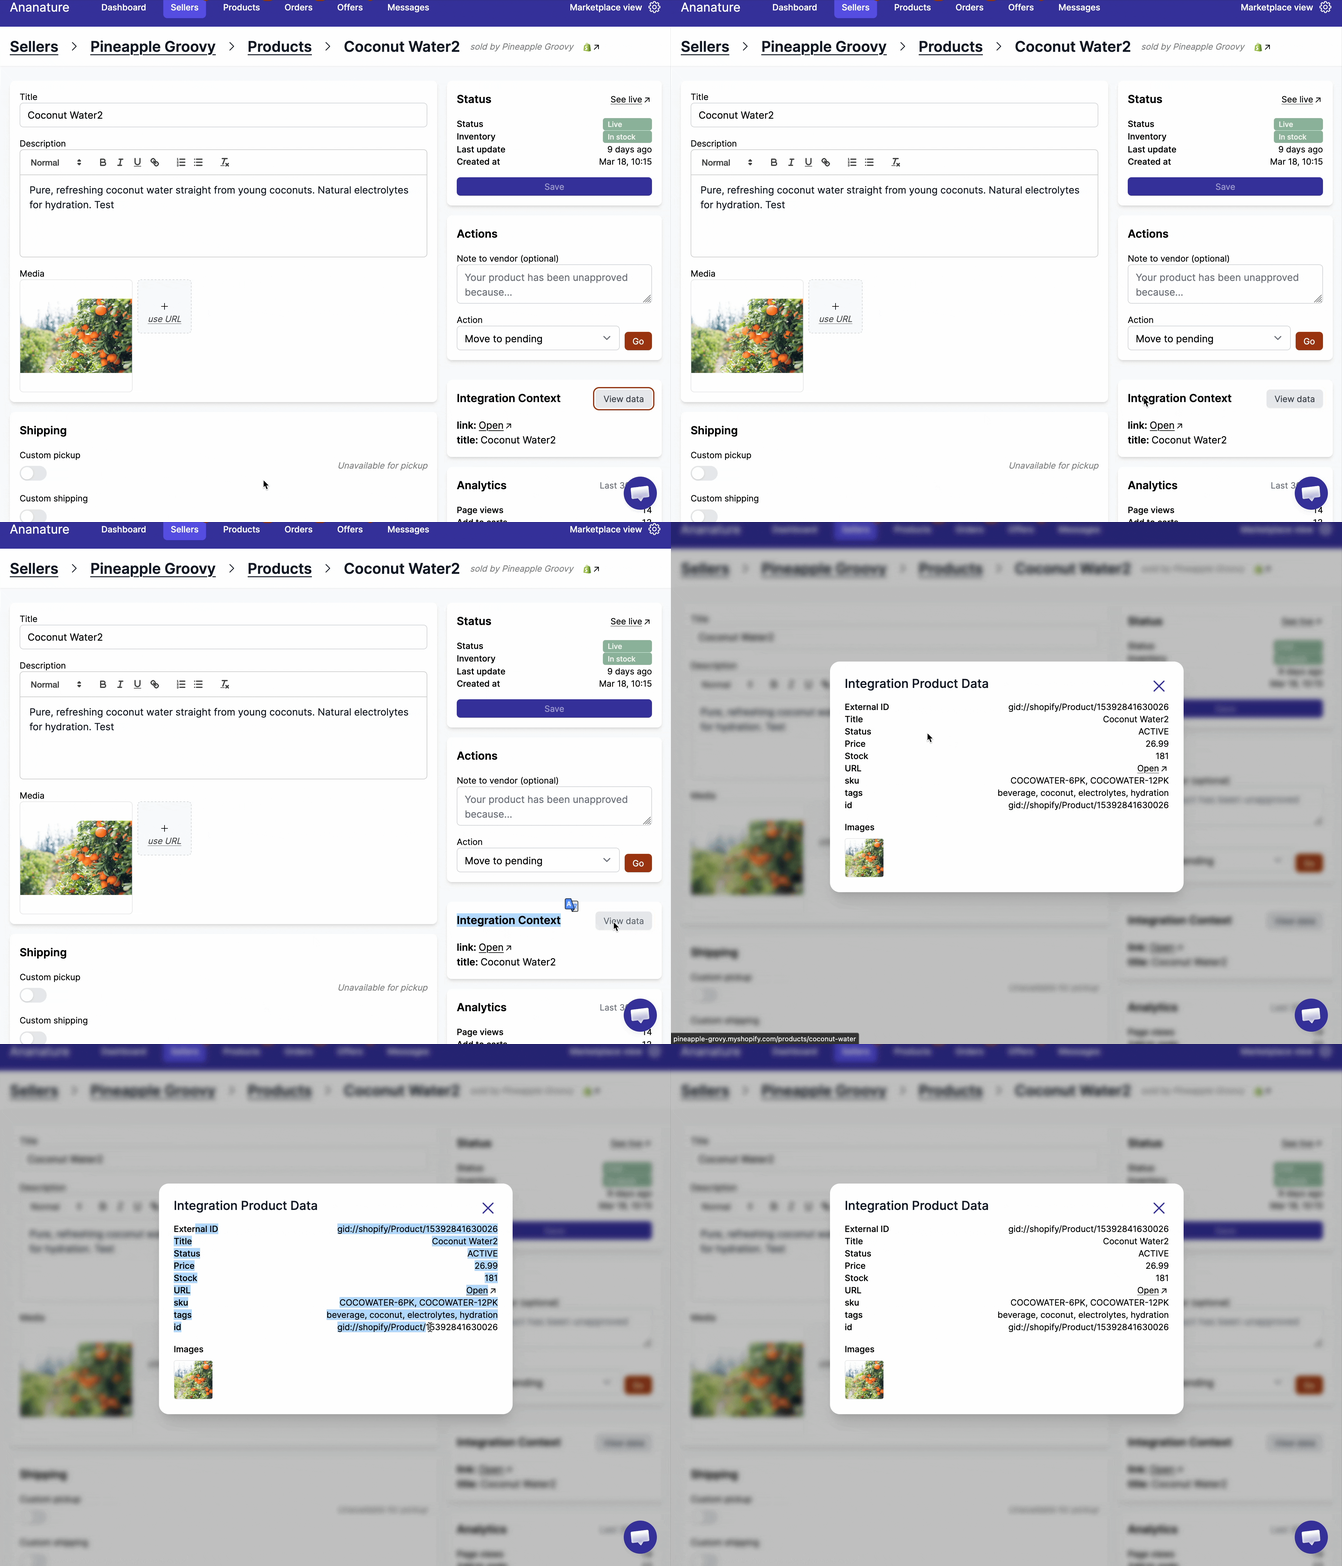
From the product edit page, you can view the raw data fetched from the vendor's integration. Click the "View data" button in the Integration Context card to inspect the product's details as stored in the seller's store.
Once per hour.
To avoid hurting the vendor's eCommerce, any synchronisation update is limited to once per hour.
Price and compare price transformation
The vendor and the marketplace can change the product price before it is sent to the marketplace. The price transformation can either be an addition, a multiplication, or a combination of both.
This can be configured in Garnet > Settings > Integrations, by clicking on a connected integration.
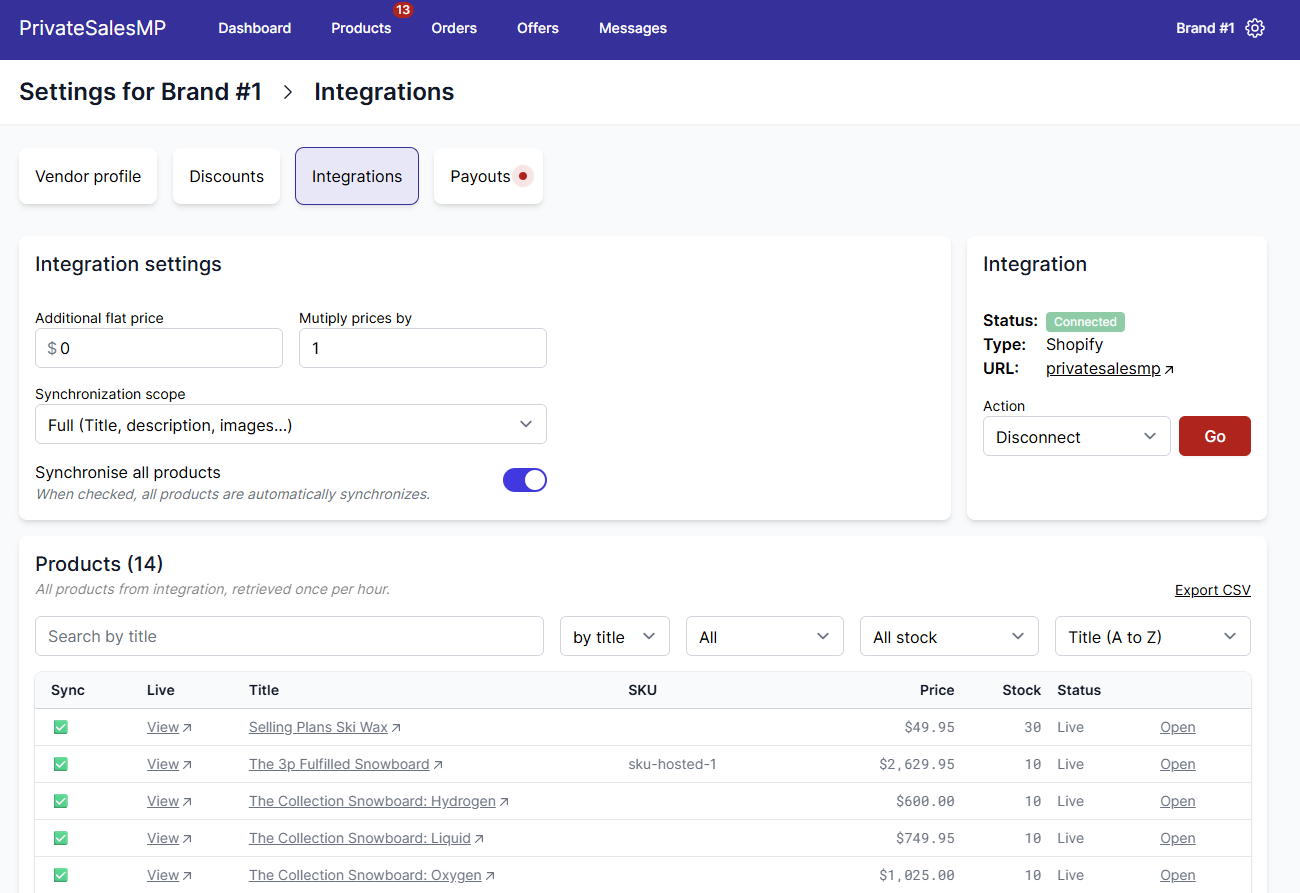
Example 1: a vendor wants to add a flat fee for the marketplace. A product is for sale at $20 and there is a flat $4 increment, the price on the marketplace will be $24.
Example 2: a vendor wants to discount all their products by 20%. A product is for sale at $20 and there is a ratio increment of 0.8, the price on the marketplace will be $16.
Garnet uses the following formula to compute the marketplace price:
Marketplace price = flat + original price * factorOnce changed, it can take up to 10 minutes to update all prices.
Some integrations provide the price transformation interface outside of Garnet as well.
Multi-currency example
When a vendor sells in a different currency than the marketplace, you can use the price multiplier to account for the exchange rate — and optionally add a margin on top.
Example: EUR vendor on an AUD marketplace
Say your marketplace currency is AUD and a vendor sells in EUR. Their product is listed at €85 in their Shopify store. Without a multiplier, it would appear as $85 AUD on your marketplace, which is incorrect.
Step 1: Account for the exchange rate If the current exchange rate is 1 EUR = 1.63 AUD, set the price multiplier to 1.63. The product will now display at approximately $139 AUD.
Step 2: Add a vendor margin (optional) If the vendor also wants to apply a 30% margin on top of that, multiply the two factors together: 1.63 (exchange rate) × 1.3 (margin) = 2.12. Set the multiplier to 2.12. The €85 product will then appear at approximately $180 AUD on the marketplace.
You can view and adjust this setting under Garnet > Vendors > Integrations > Price transformations.
Do not synchronise prices
Sometimes the marketplace prefers to not synchronise the prices between the vendor and the marketplace. When this feature is turned on, vendor's product will be created with the vendor price, and all subsequent update will not change the marketplace's price.
This allows the marketplace to price the product the way they like.
Do not synchronise orders
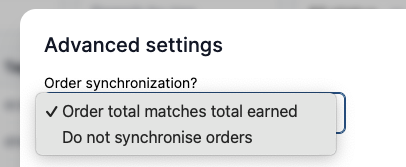
The marketplace can turn off order forwarding for a specific vendor. When this setting is active, paid orders are no longer sent to the vendor's eCommerce platform — product and stock synchronisation are not affected.
This can be configured in Garnet > Settings > Integrations, by clicking on a connected integration, then Advanced, and selecting Do not synchronise orders under Order synchronization.
Order integration metafield
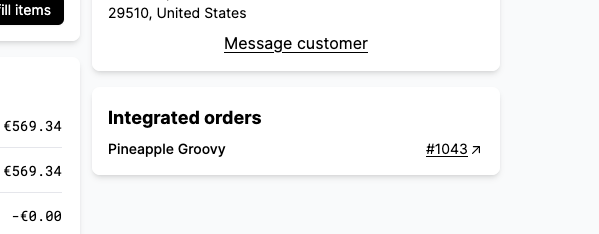
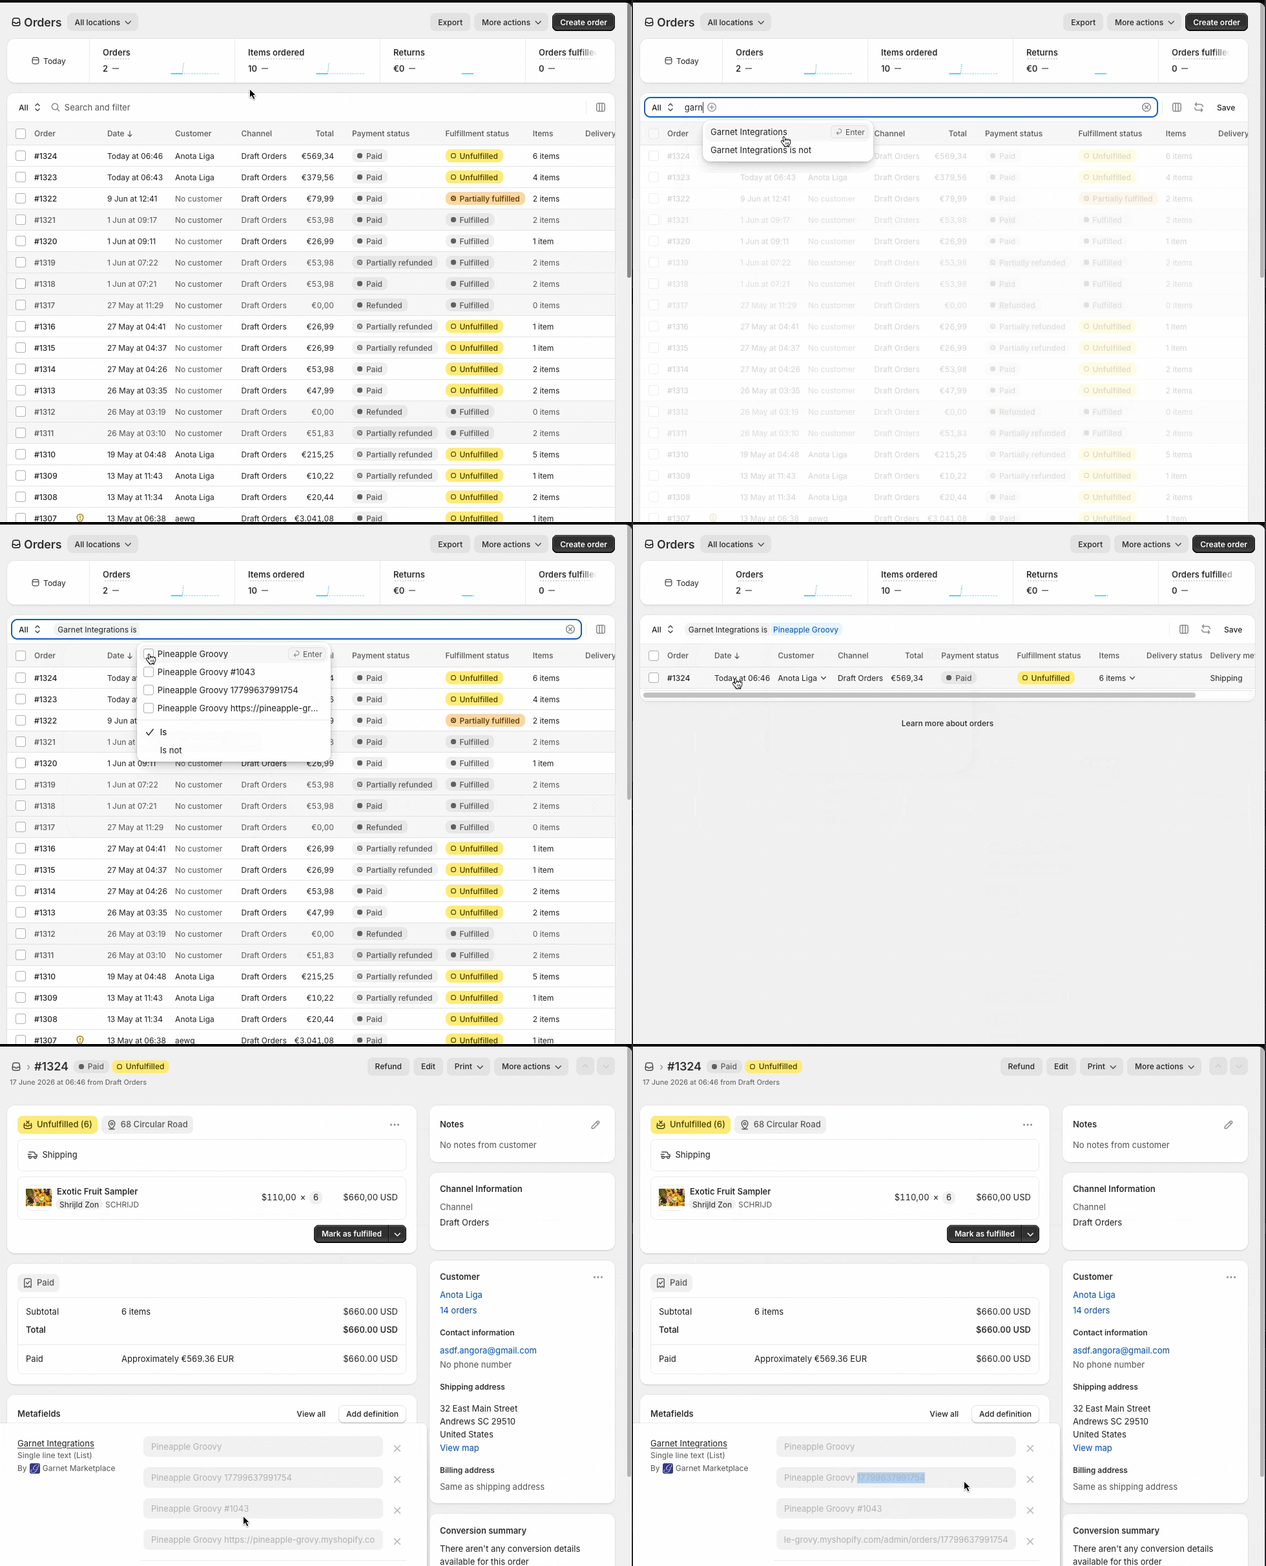
When an order is forwarded to a vendor's store, Garnet records integration details as a metafield on the marketplace order. This metafield includes the vendor name, the vendor's order ID, order name, and a direct link to the order in the vendor's store.
This metafield is filterable in Shopify admin, which means you can search orders by vendor name or by the vendor's order name directly from the Shopify orders list.
Shopify only
This feature is currently available for Shopify integrations only.
Order forwarding failure emails
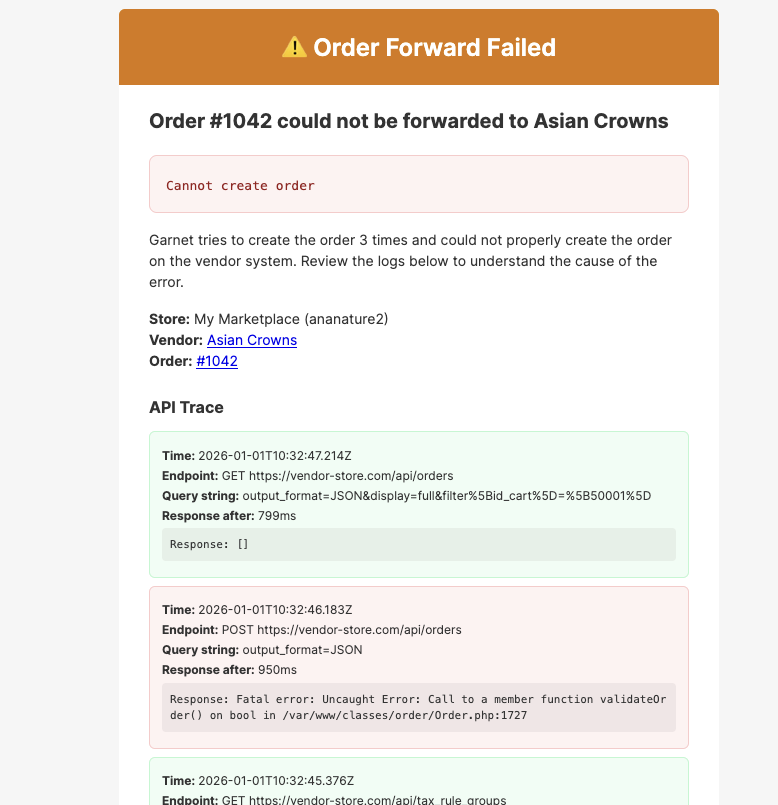
When an order fails to be forwarded to a vendor's store (Prestashop, Shopify, or WooCommerce), Garnet sends an error notification email that includes a full API trace showing every request made during the attempt. Each request displays the endpoint, query string, response time, and response body, color-coded by status (green for success, red for errors). This makes it much easier to diagnose integration issues without checking server logs.
Disconnect
The integration can be disconnected directly from Garnet in Garnet > Settings > Integrations > Disconnect integration. The product will remain and the products and orders will no longer be synchronised with the vendor's eCommerce software.
Reconnect integration
Garnet remembers the links between products. If a brand reconnects their integration, existing products will be updated accordingly.
If a brand already has products on their store but was never connected with Garnet Marketplace, Garnet will first try to find a product match via the variant SKU. If there is no match, the product will be created.
Default integration settings
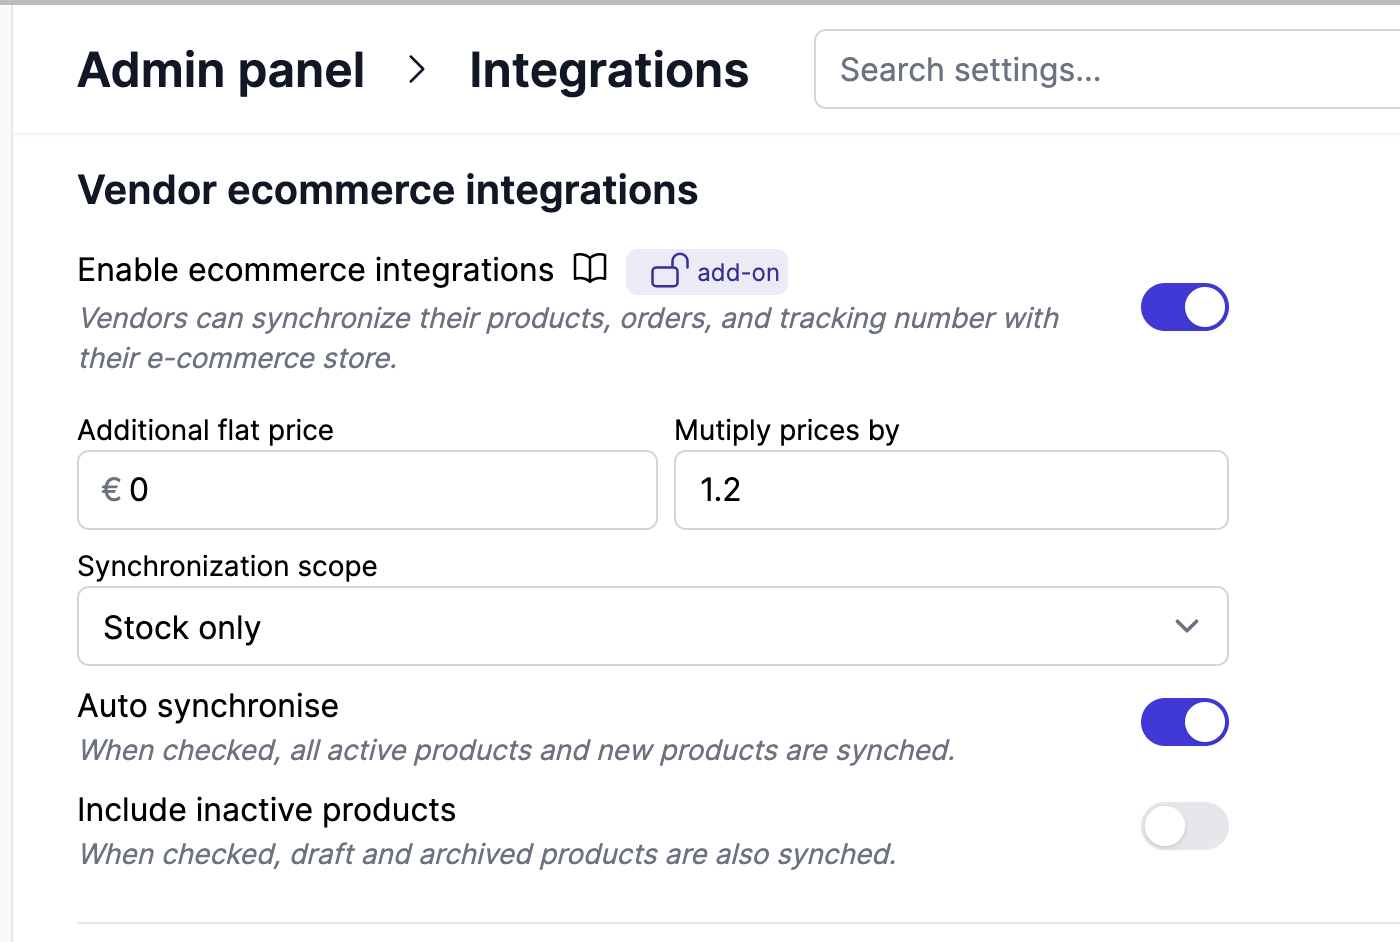
Marketplace administrators can configure default integration settings that apply to all new vendor integrations. This is done in Garnet > Admin Panel > Integrations > Vendor ecommerce integrations.
When enabled, you can set the default values for:
- Additional flat price and Multiply prices by to apply a default price transformation to all new integrations.
- Stock buffer to reserve units from being sent to the marketplace.
- Synchronization scope to choose between Full, Price and stock only, Stock only, or No product sync.
- Auto synchronise to automatically import all active products from new vendors.
- Include inactive products to also import draft and archived products.
These defaults are applied when a vendor connects a new integration. Changing the default settings only affects future integrations — existing vendor integrations are not modified. Vendors can still override these settings individually from their own integration view.
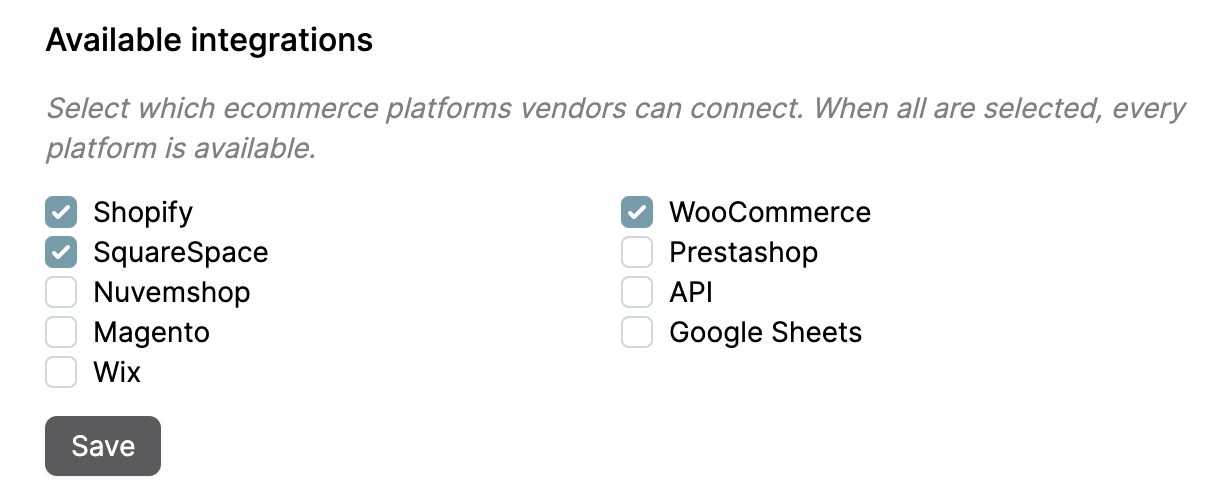
Available integrations
Marketplace administrators can restrict which ecommerce platforms vendors can connect to. By default, all platforms are available. To limit the options, go to Garnet > Admin Panel > Integrations > Vendor ecommerce integrations and uncheck the platforms you don't want vendors to use. When all platforms are checked, every integration is available.
Only the selected platforms will appear on the vendor's integration setup page.
Enable and disable integrations
You can hide the integration tab in Garnet > Admin Panel > Integrations > Vendor ecommerce integrations. It will disable access to integration to all vendors.