
Order View
Everytime an order is placed on the marketplace's Shopify store:
- the order is split per vendor,
- each vendor receives an email notification,
- integrated vendors receive the order.
View details
Marketplace and vendors can see all placed orders from the Orders tab.
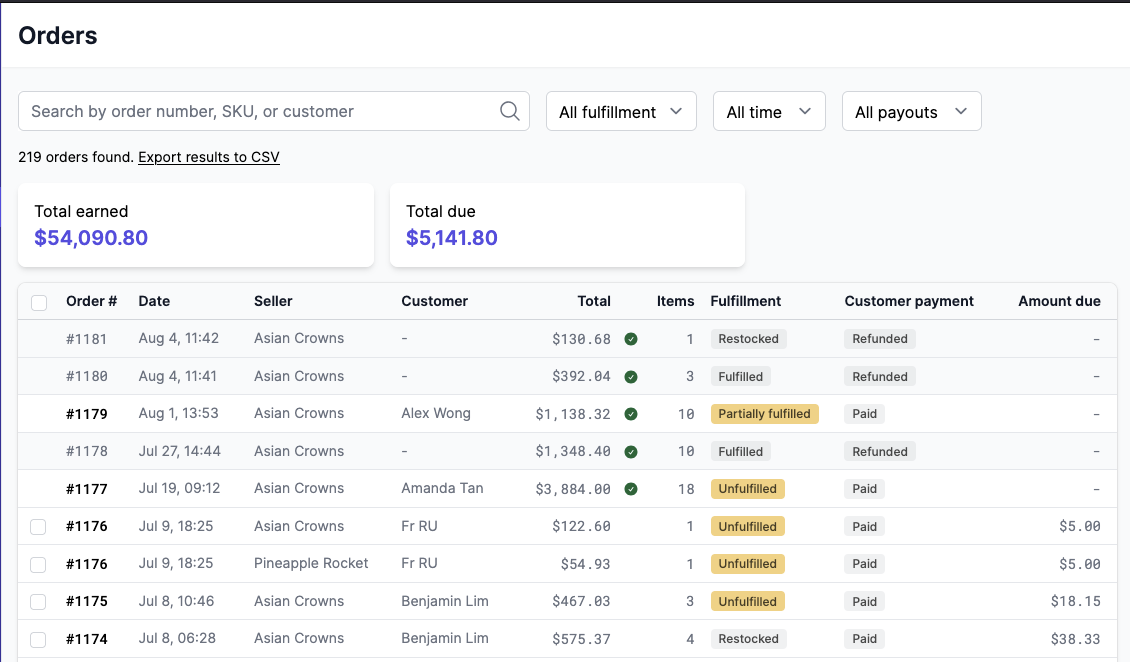
As you can see on the screenshot, it contains:
- the number of unfulfilled orders next to the
Orderstab, - the search bar to find an order by its order number, customer name, SKU, product name, or date,
- the fulfillment filter:
All fulfillment,Unfulfilled,Fulfilled,Cancelled, - the payout filter:
All payouts,Paid orders,Due orders,Overpaid orders,Unpaid, - the sort filter:
Latest first,Oldest first,Total,Amount due, - the period filter:
All time, a preset such asLast 7 days, or aCustom...range, - the list of all displayed orders.
Auto-refresh
Garnet Marketplace can be used as a Point of Sale (POS) device.
The order view refreshes itself every minute and every time you come back to the tab. This ensures that if you keep the order view open, the order list will always be up to date.
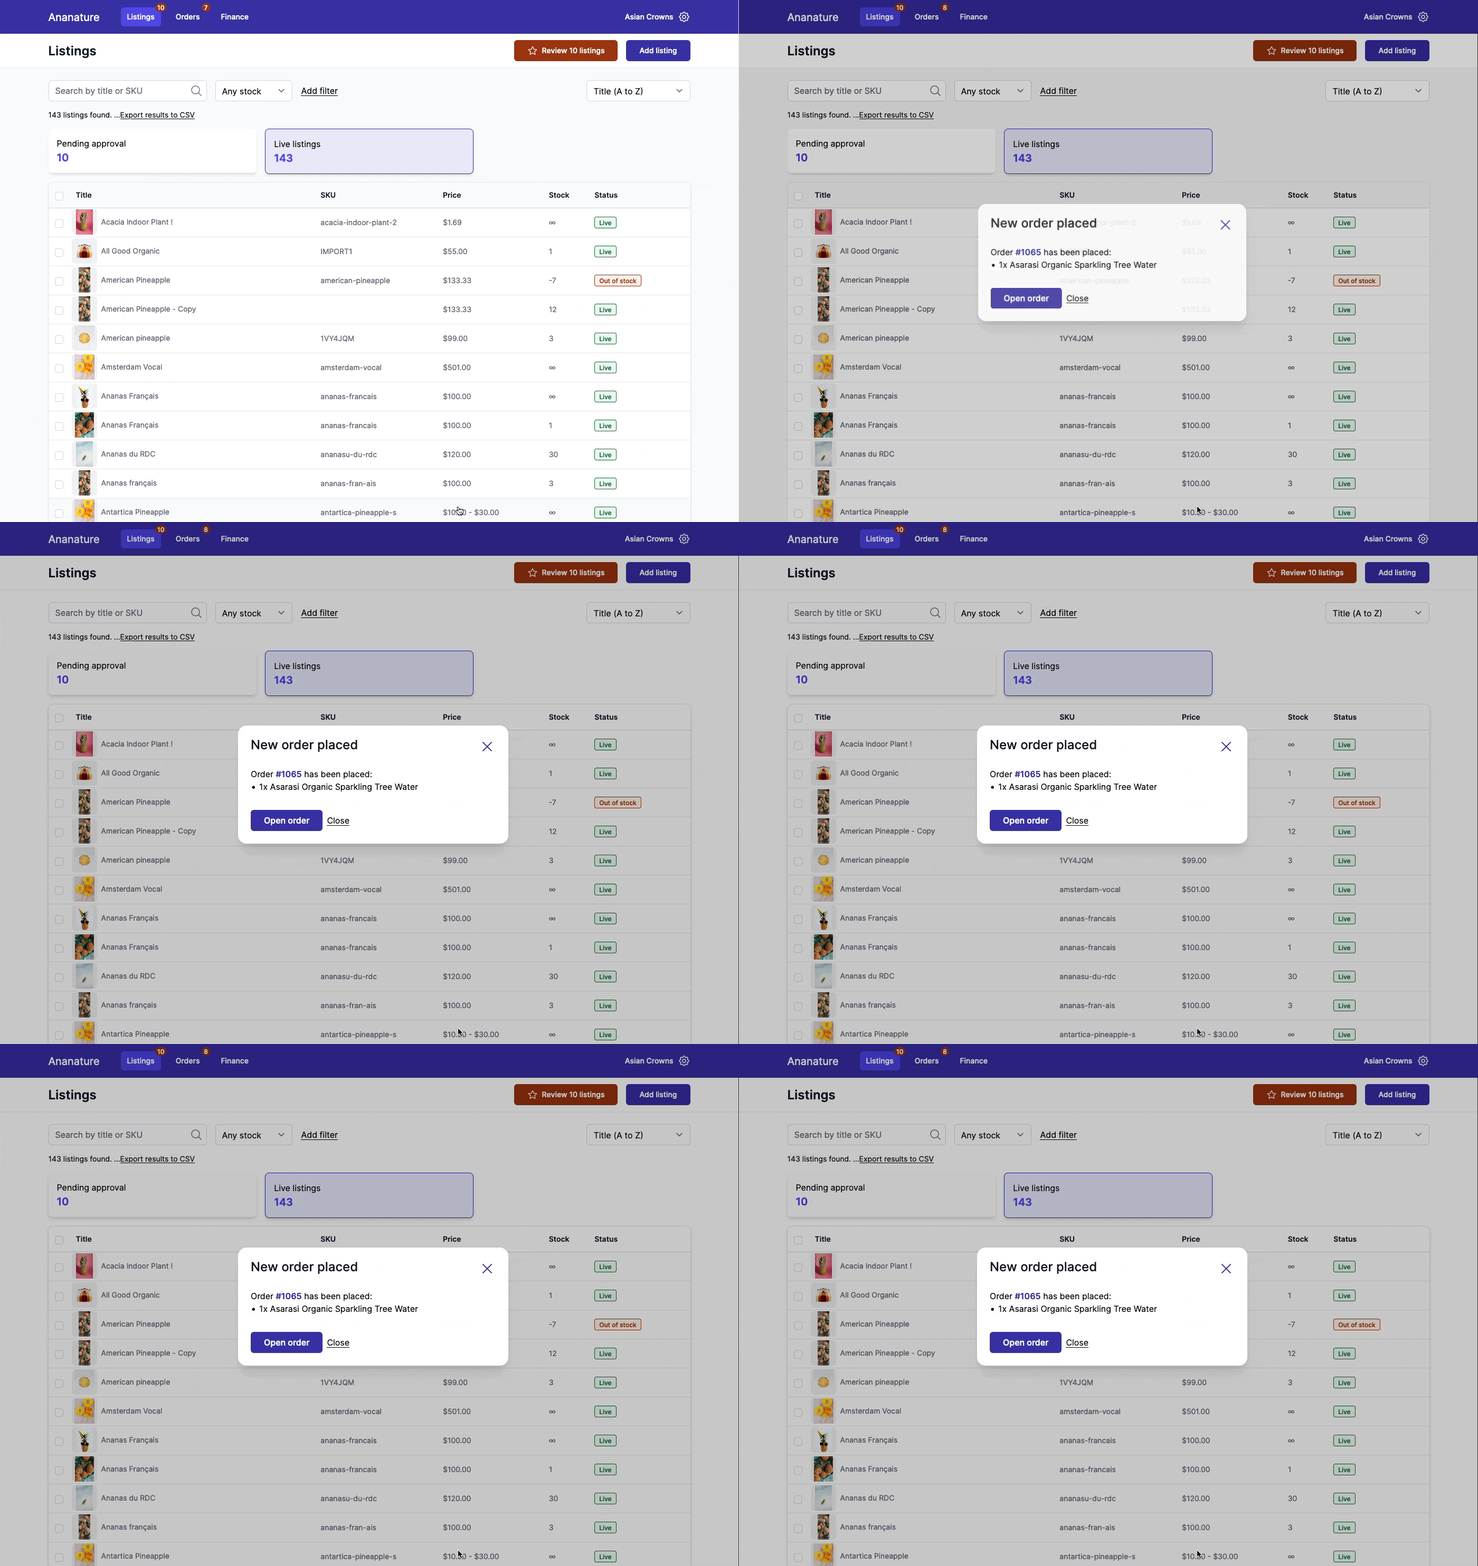
When a new order is placed, a popup will show presenting the new order:
Order status
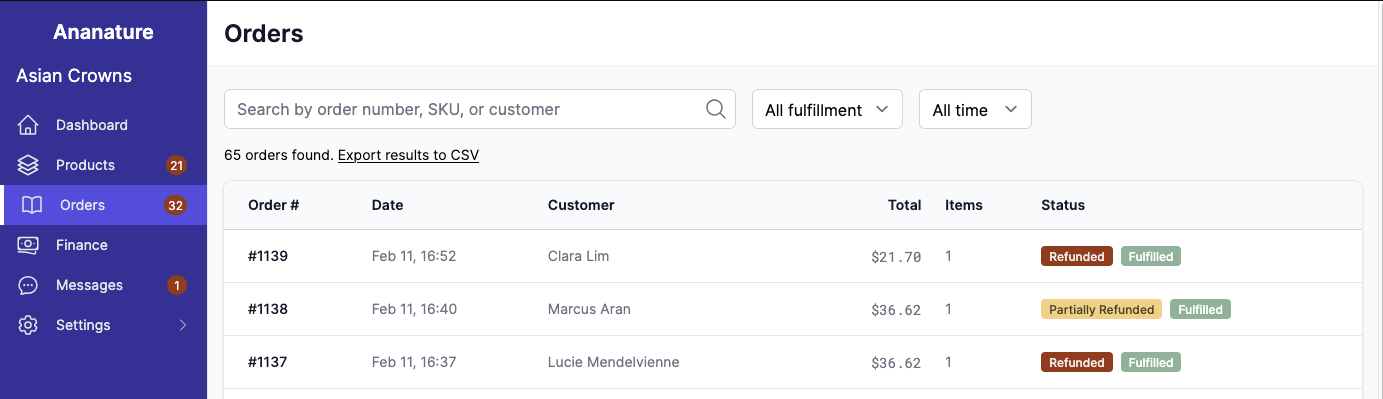
The displayed order status is closely related to how Shopify computes the order. See more information in the split per vendor section.
Orders that are not paid (such as unpaid orders or refunded) will have the additional payment status displayed.
Recurring order
Subscription orders are in fact regular orders that are renewed periodically. Check our subscription integration to configure your recurring orders.
Filter by date
The period filter shows the orders placed in a given time range. Pick All time or one of the presets: Today, Yesterday, This week, Last week, Last 7 days, This month, Last month, Last 30 days, This quarter, Last quarter, Last 90 days, This year or Last year. Presets follow today's date, so a bookmarked Last 7 days always shows the last seven days.
To choose your own range, pick Custom.... A window opens with the last 7 days already selected:
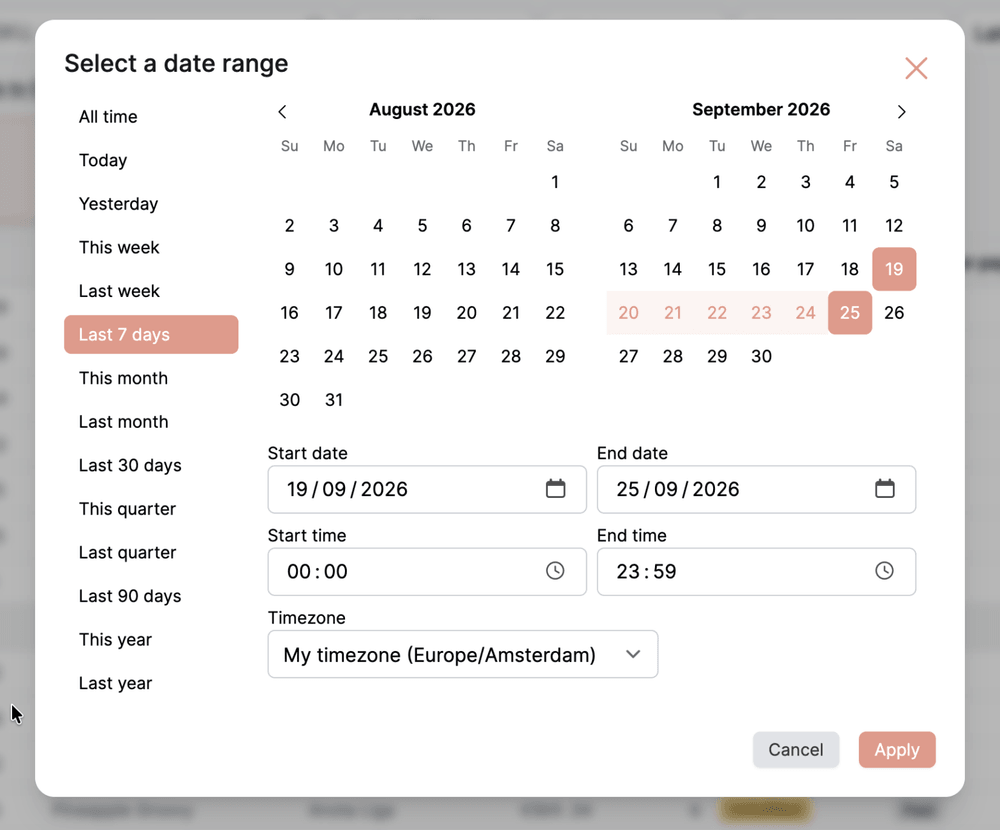
- Click a preset on the left, or click the first and last day of the range on the calendar. You can also type them in
Start dateandEnd date. - Set
Start timeandEnd timeto narrow the range to the minute, for instance to find the orders of a single shift. - Choose the
Timezonethe range is read in. It defaults to your computer's timezone;Shop timezoneuses your shop's when it differs. - Click
Apply.
The selected range then shows next to the filter. Click it to change the range.