
Appearance
Marketplace setup with Stripe integrations
The Stripe Connect integration is a payment solution for marketplaces to automatically pay their vendors.
Whenever the marketplace needs to pay its vendors, Garnet will initiate a Stripe payment from the marketplace account to the vendor account.
The payment is sent in the marketplace currency. When the vendor's Stripe account settles in another currency, Stripe converts it on arrival at its live exchange rate, so the vendor receives their own currency.
The payout events can be customized within Garnet to suit your marketplace needs.
Note that Garnet only facilitates the payment and is never holding the customer's money at any time.
WARNING
Please ensure you have followed all steps below. Most marketplaces having issues with the Stripe integration is simply because they missed a step.
Step 1: Create a Stripe Account and get verified
The marketplace must create a Stripe account following the registration link. After replying to all questions you will need to get verified. It can take a few days and require you to send additional verification documents.
Step 2: Enable Stripe Connect
Setup Stripe Connect for the marketplace account by going to Stripe > Settings > Product settings > Connect or clicking on this link. Then click on the Get started with Connect button.
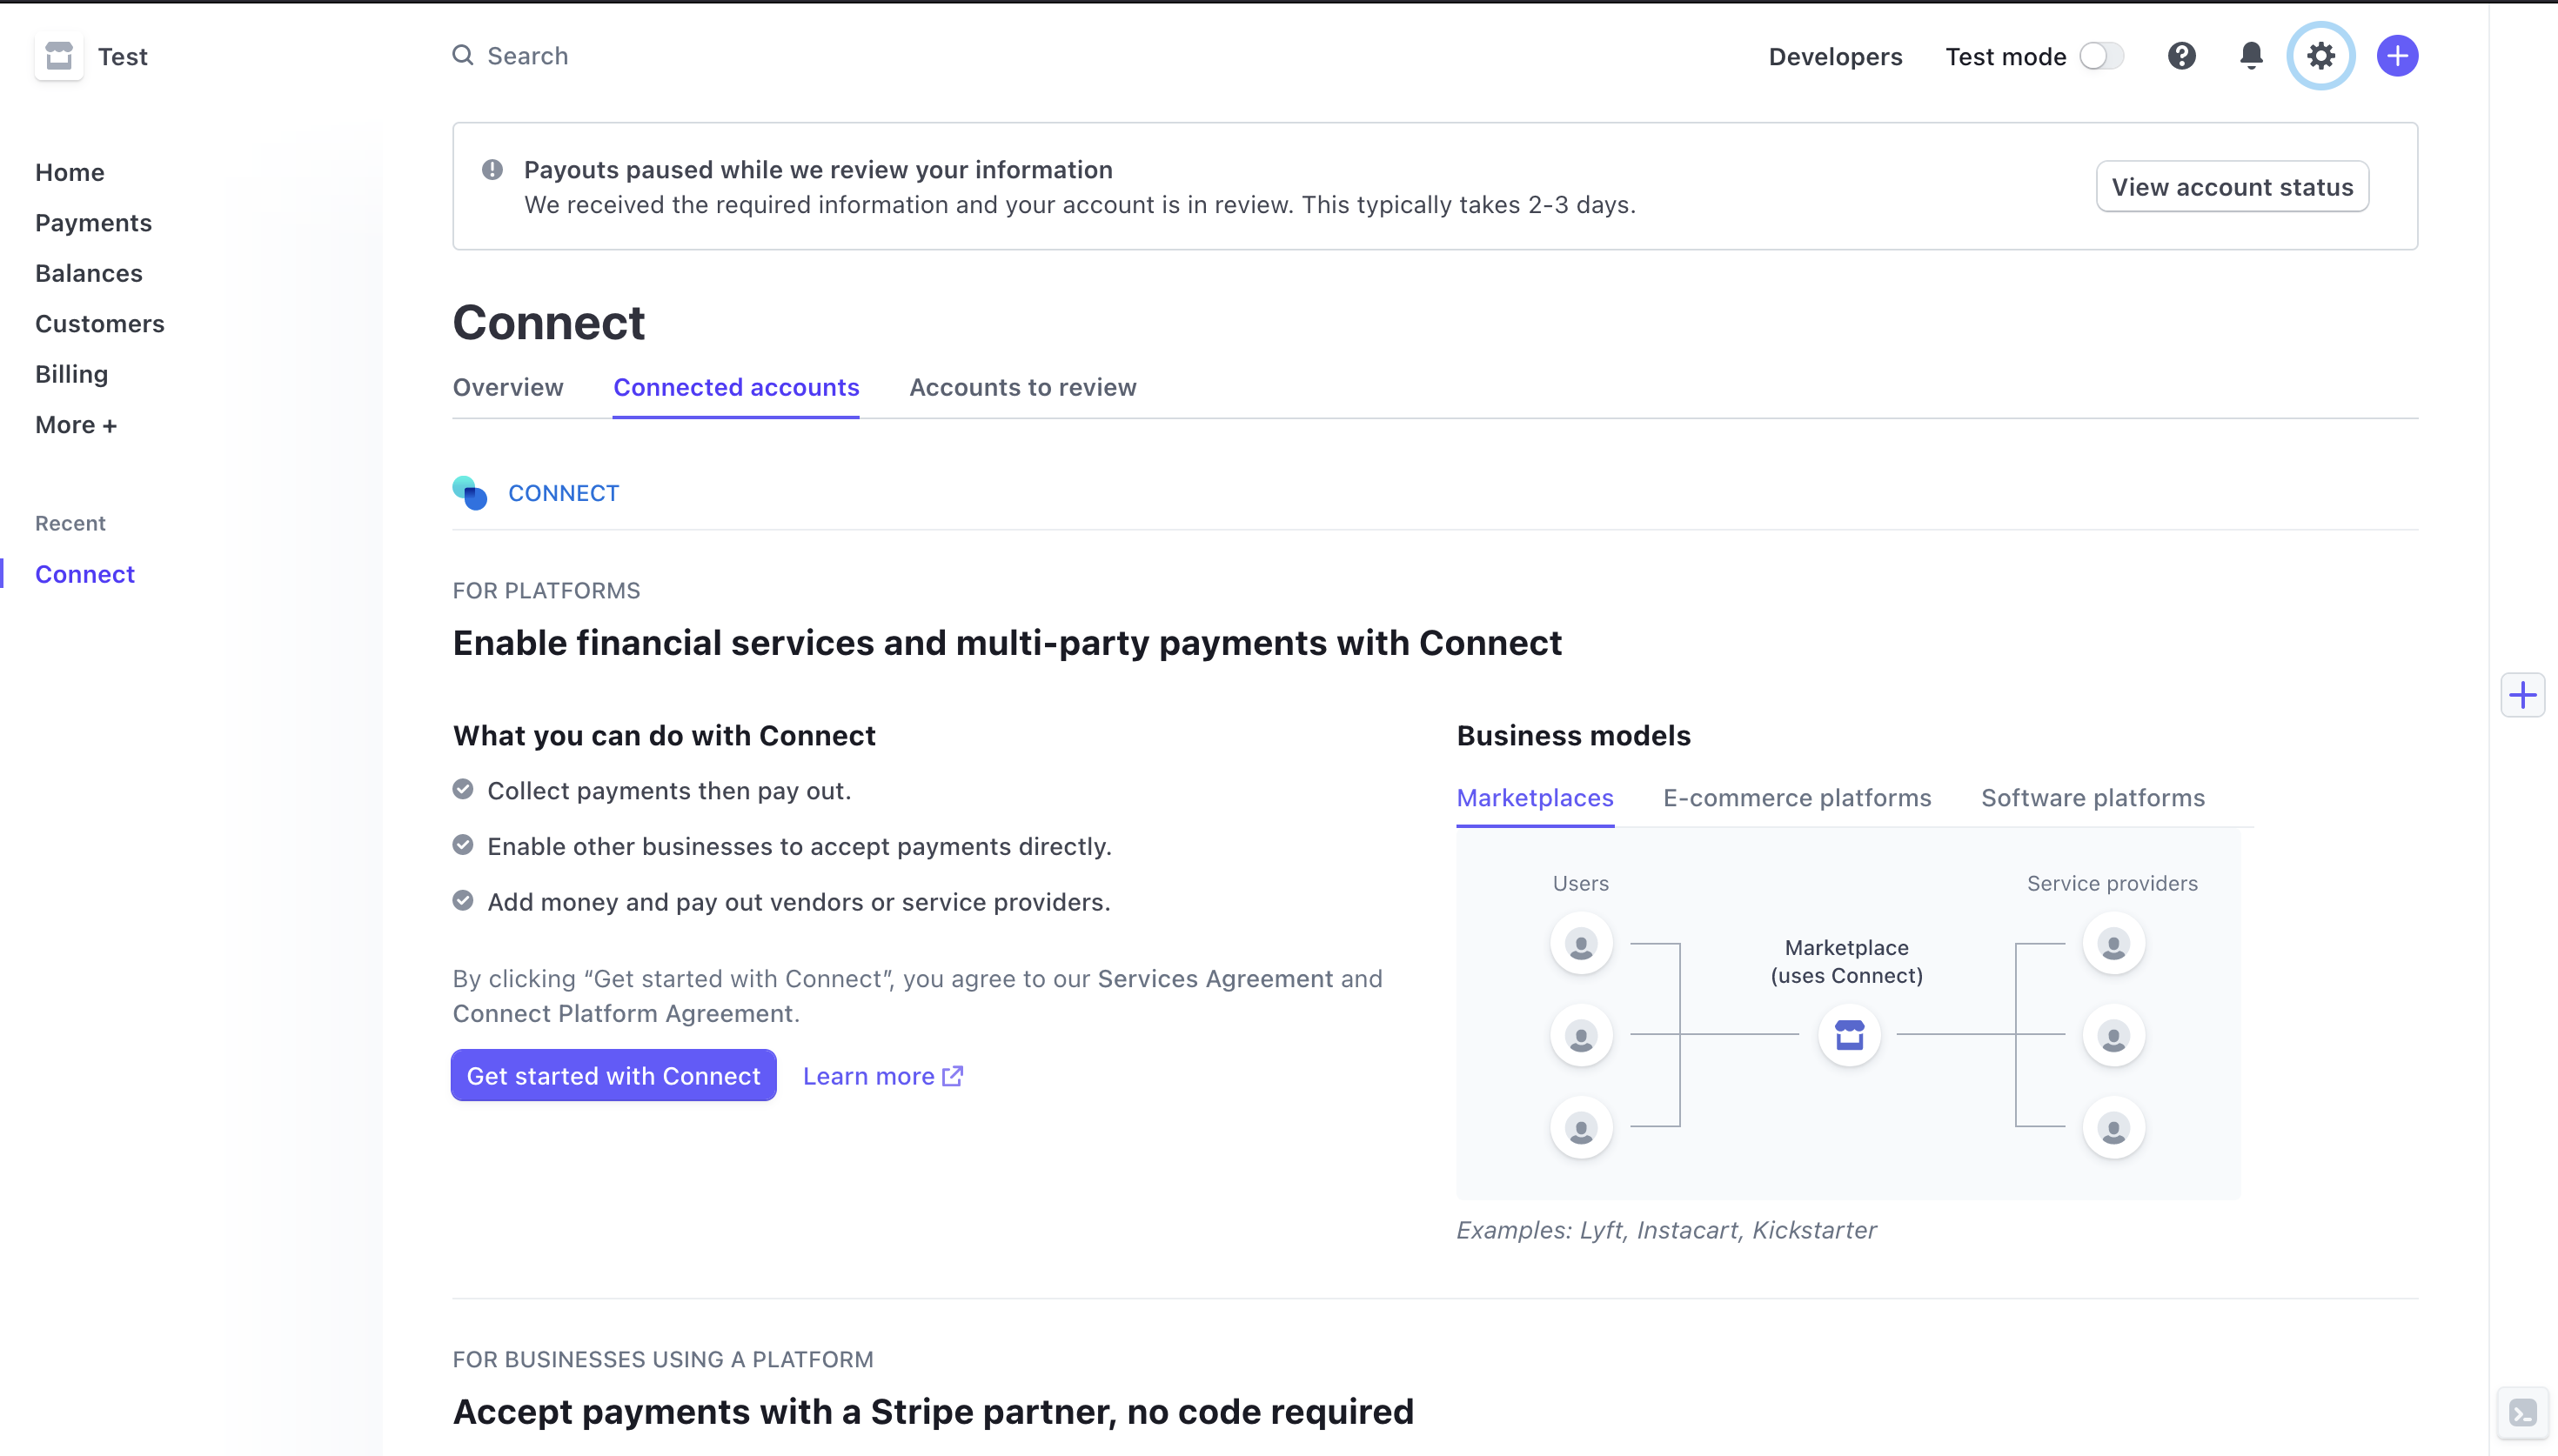
You will have several questions to answer about your business. If you have any question you can contact us. It might take a few days for the account to be verified.
Step 3: Set your branding
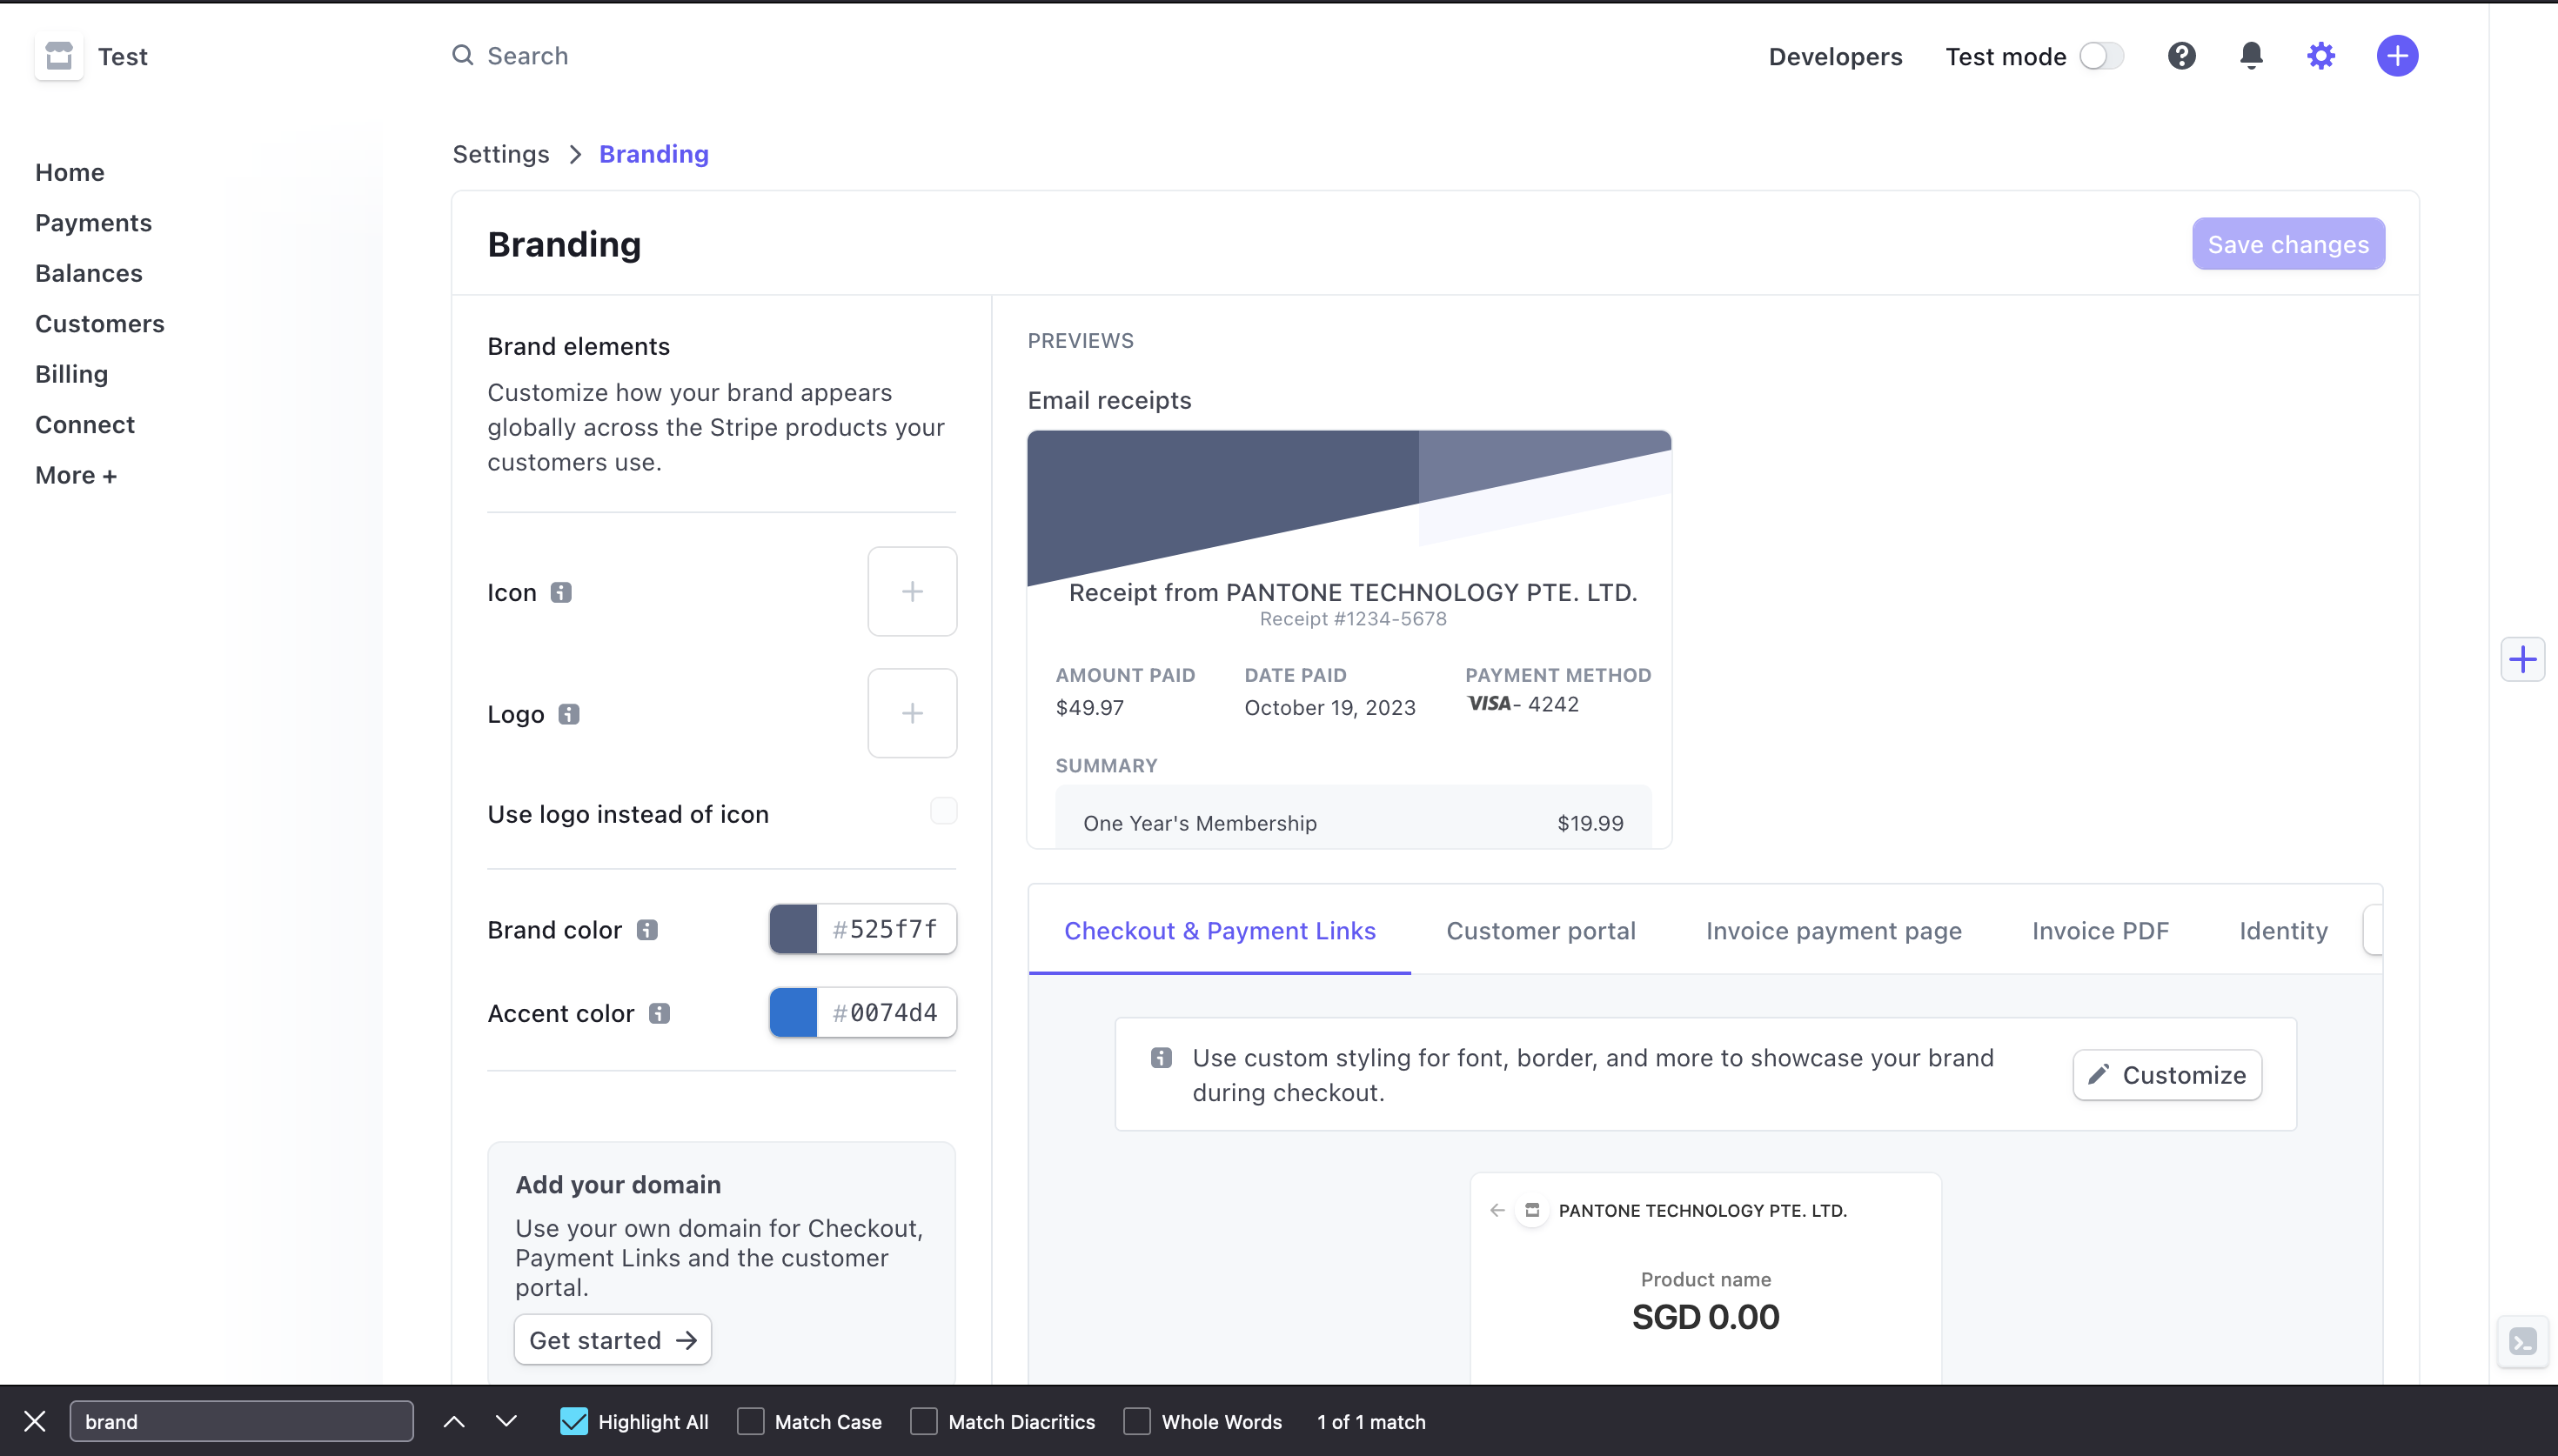
It is important that you set up your logo and theme color in Stripe. Go to Stripe > Settings > Branding or use this link.
Follow the steps provided by Stripe and customize the branding to your liking.
Step 4: Generate a Stripe API key
Then go to Stripe > Developers > API keys and copy the Secret key, you will need it later for the setup.
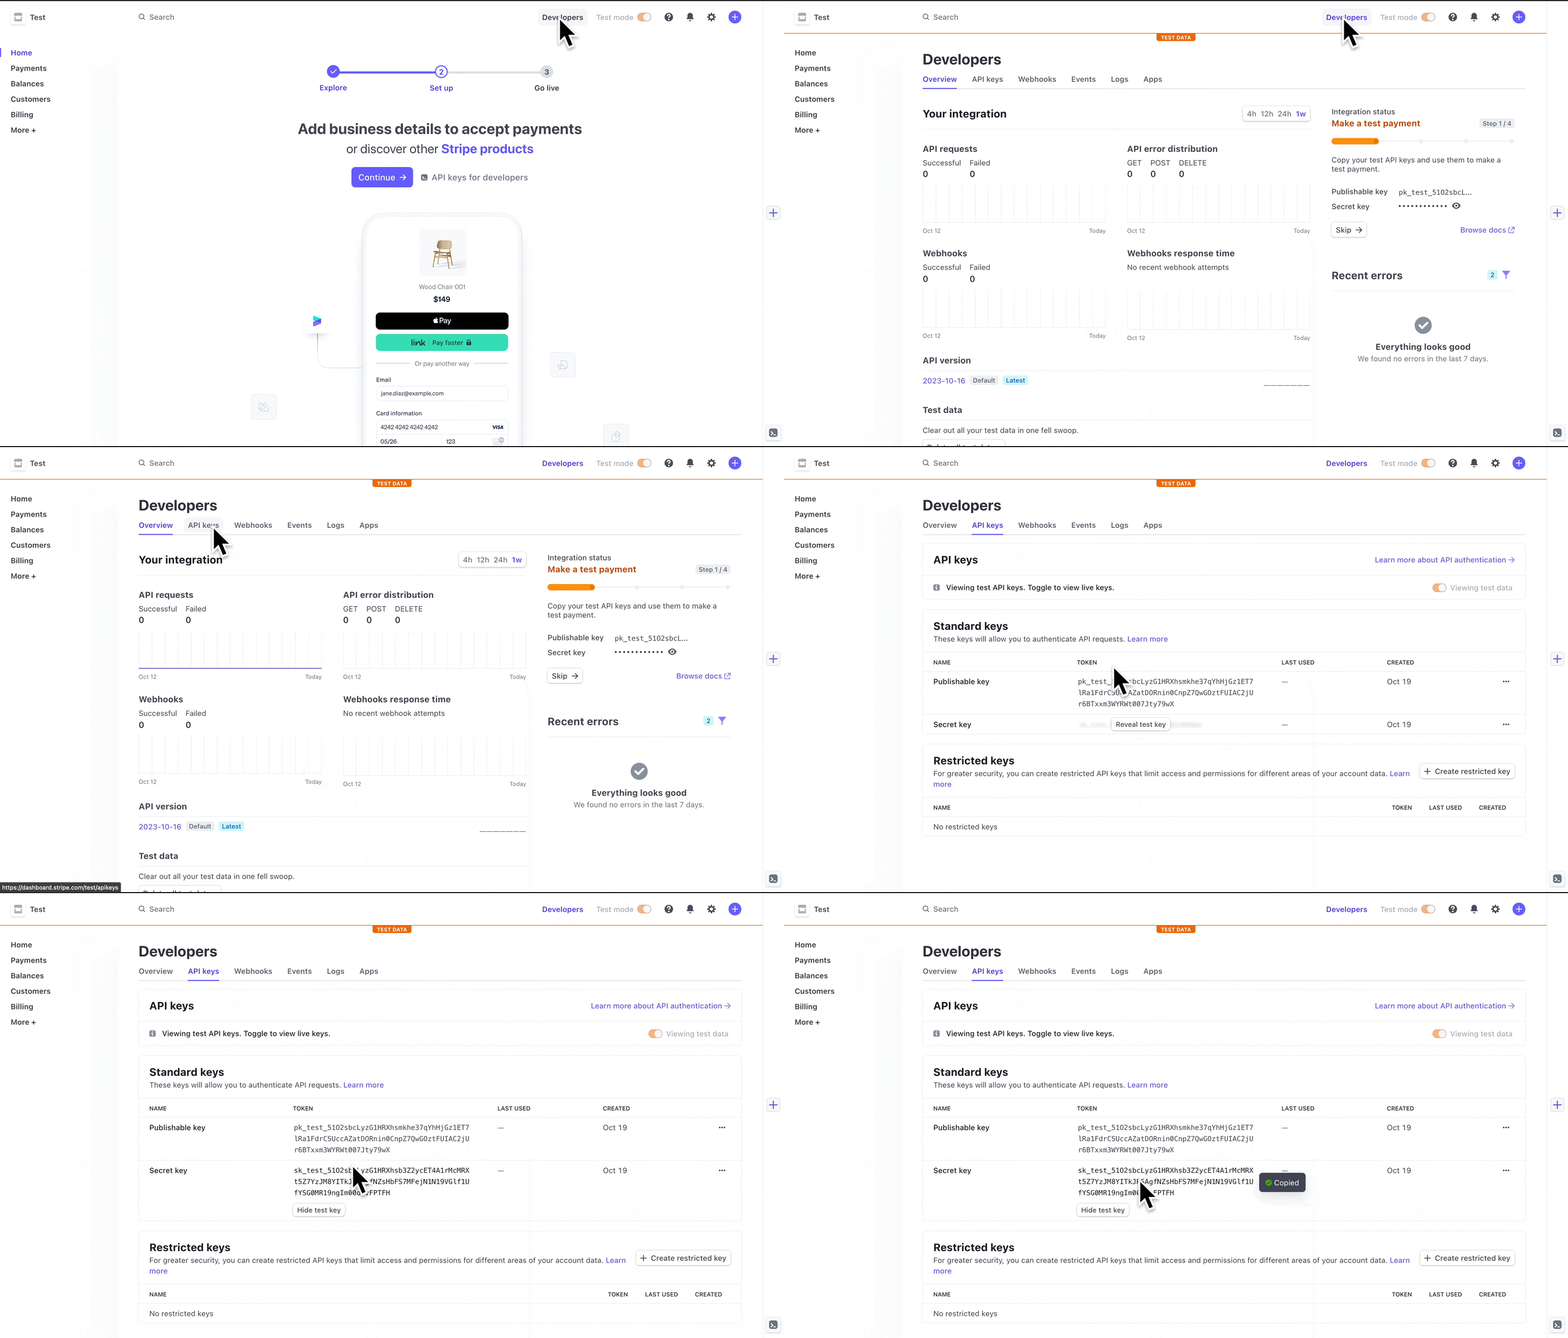
The integration requires a standard API secret key starting with sk_live_. Restricted API keys (rk_live_) are not supported. You can use sandbox API keys (sk_test_) if necessary.
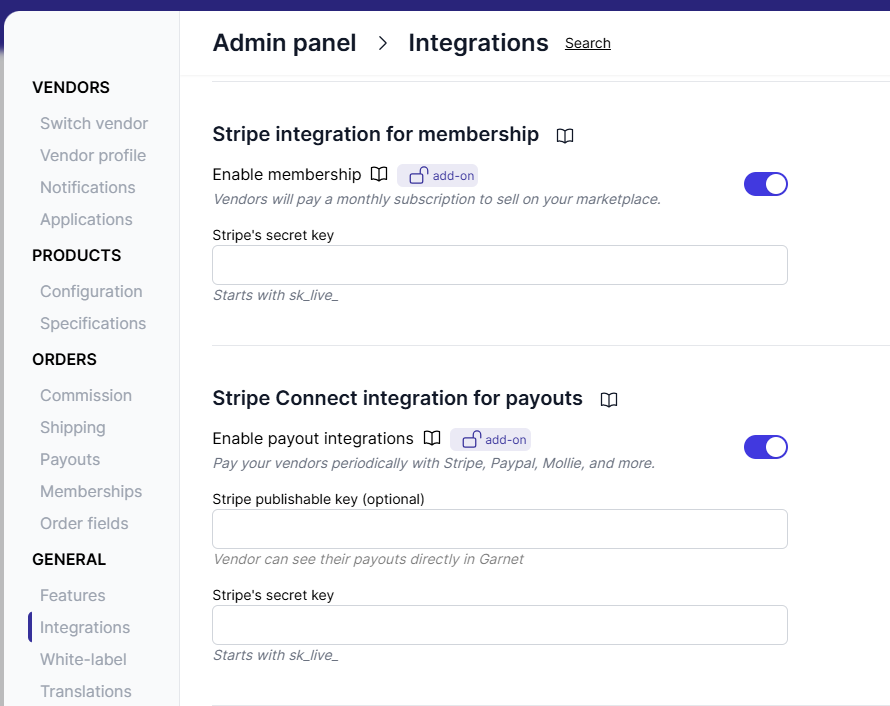
On Garnet, go to Admin panel > Finance > Payout methods > Stripe Connect integration for payouts and input your credentials in the form.
WARNING
Stripe is not available in some countries, make sure to check their availability page.
Step 5: Choose where payouts are taken from
Garnet can pay vendors in two ways, set in Admin panel > Finance > Payout methods > Stripe Connect integration for payouts under Payment source:
From the Stripe balance (default) | From the marketplace's credit card | |
|---|---|---|
| How | A Stripe transfer from your balance to the vendor's account | Stripe charges the card saved on your own Stripe customer for the payout amount and routes it to the vendor |
| Funds needed | ❌ Your balance must already hold the amount: top it up from your bank before each payout, unless customers already pay through this Stripe account | ✅ None, the card is charged at the moment of the payout |
| Stripe fee | ✅ None | ❌ Stripe's card fee on every payout, charged to the marketplace, about 1.5% to 3% plus a fixed amount depending on the vendor's country |
| Currency conversion | Stripe's conversion fee when the vendor settles in another currency | The same conversion fee |
| Amount sent | ❌ Sent in the marketplace currency, Stripe converts it on arrival at the live rate, so the vendor sees the marketplace amount first | ✅ The payment settles directly in the vendor's currency, the vendor sees one payment in their own currency |
| Vendors abroad | ❌ Only vendors in Stripe's cross-border regions (US, UK, EEA, Canada, Switzerland); Stripe rejects the transfer elsewhere | ✅ Any country where Stripe Connect is available, the charge is made on behalf of the vendor |
| When it fails | Insufficient balance: the vendor is listed under Failed payouts and retried at the next payout | Card declined or expired: same retry at the next payout |
In short, the balance is cheaper but needs a bank transfer to Stripe before every payout, and the card costs a fee on each payout but works everywhere without any funding step.
From the Stripe balance
If the balance cannot cover a transfer, Stripe rejects it with You have insufficient funds in your Stripe account and the vendor is listed under Failed payouts in the payout report. Garnet retries the failed vendors at the next scheduled payout, so nothing is lost, but the money has to be on the balance first.
- If customers pay through this same Stripe account, the balance fills itself.
- Otherwise add funds from your bank:
Stripe > Balance > Add to balance, selectPayments balanceand transfer the amount from your bank account. Stripe only accepts bank transfers and bank debits here, never a card. In the UK a Faster Payments transfer is available within the hour. See Stripe's guide.
TIP
When you fund the balance by bank transfer, set your Stripe payouts to manual in Stripe > Settings > Payouts. With automatic payouts, anything above the minimum balance is sent back to your bank a few days later, and the next vendor payout fails again.
From the marketplace's credit card
Garnet charges your card and sends the funds to the vendor in one Stripe payment, so you never need to keep a balance. To set it up:
- In
Stripe > Customers, create a customer for your own marketplace and save the card to charge on it, set as its default payment method. Copy the customer ID, it starts withcus_. - In Garnet, choose
From the marketplace's credit cardand paste the customer ID. Garnet charges the customer's default payment method, so to change the card later, change the default in Stripe.
Each payout appears on your Stripe account as a payment Garnet payout to <vendor> followed by a transfer to the vendor, and on the vendor's account as a payment for the full amount in their own currency. Stripe's card fee is debited from your balance in the vendor's currency, so a marketplace paying vendors abroad accumulates small negative balances in those currencies; Stripe settles them against your bank account.
Cost
Stripe Connect comes at roughly USD $2/vendor/month + 0.25% for each transaction. Checkout Stripe Connect pricing for more information under the Express account type.