
Invite a vendor manually
The marketplace can add vendors directly from Garnet. Email addresses can be added to the vendor to send them an invitation to access their Garnet environment.
If you already have products from a vendor, you can autofill the vendor name to ensure they access their own products and orders.
This is one of the 4 ways to invite a vendor on Garnet.
Add a vendor
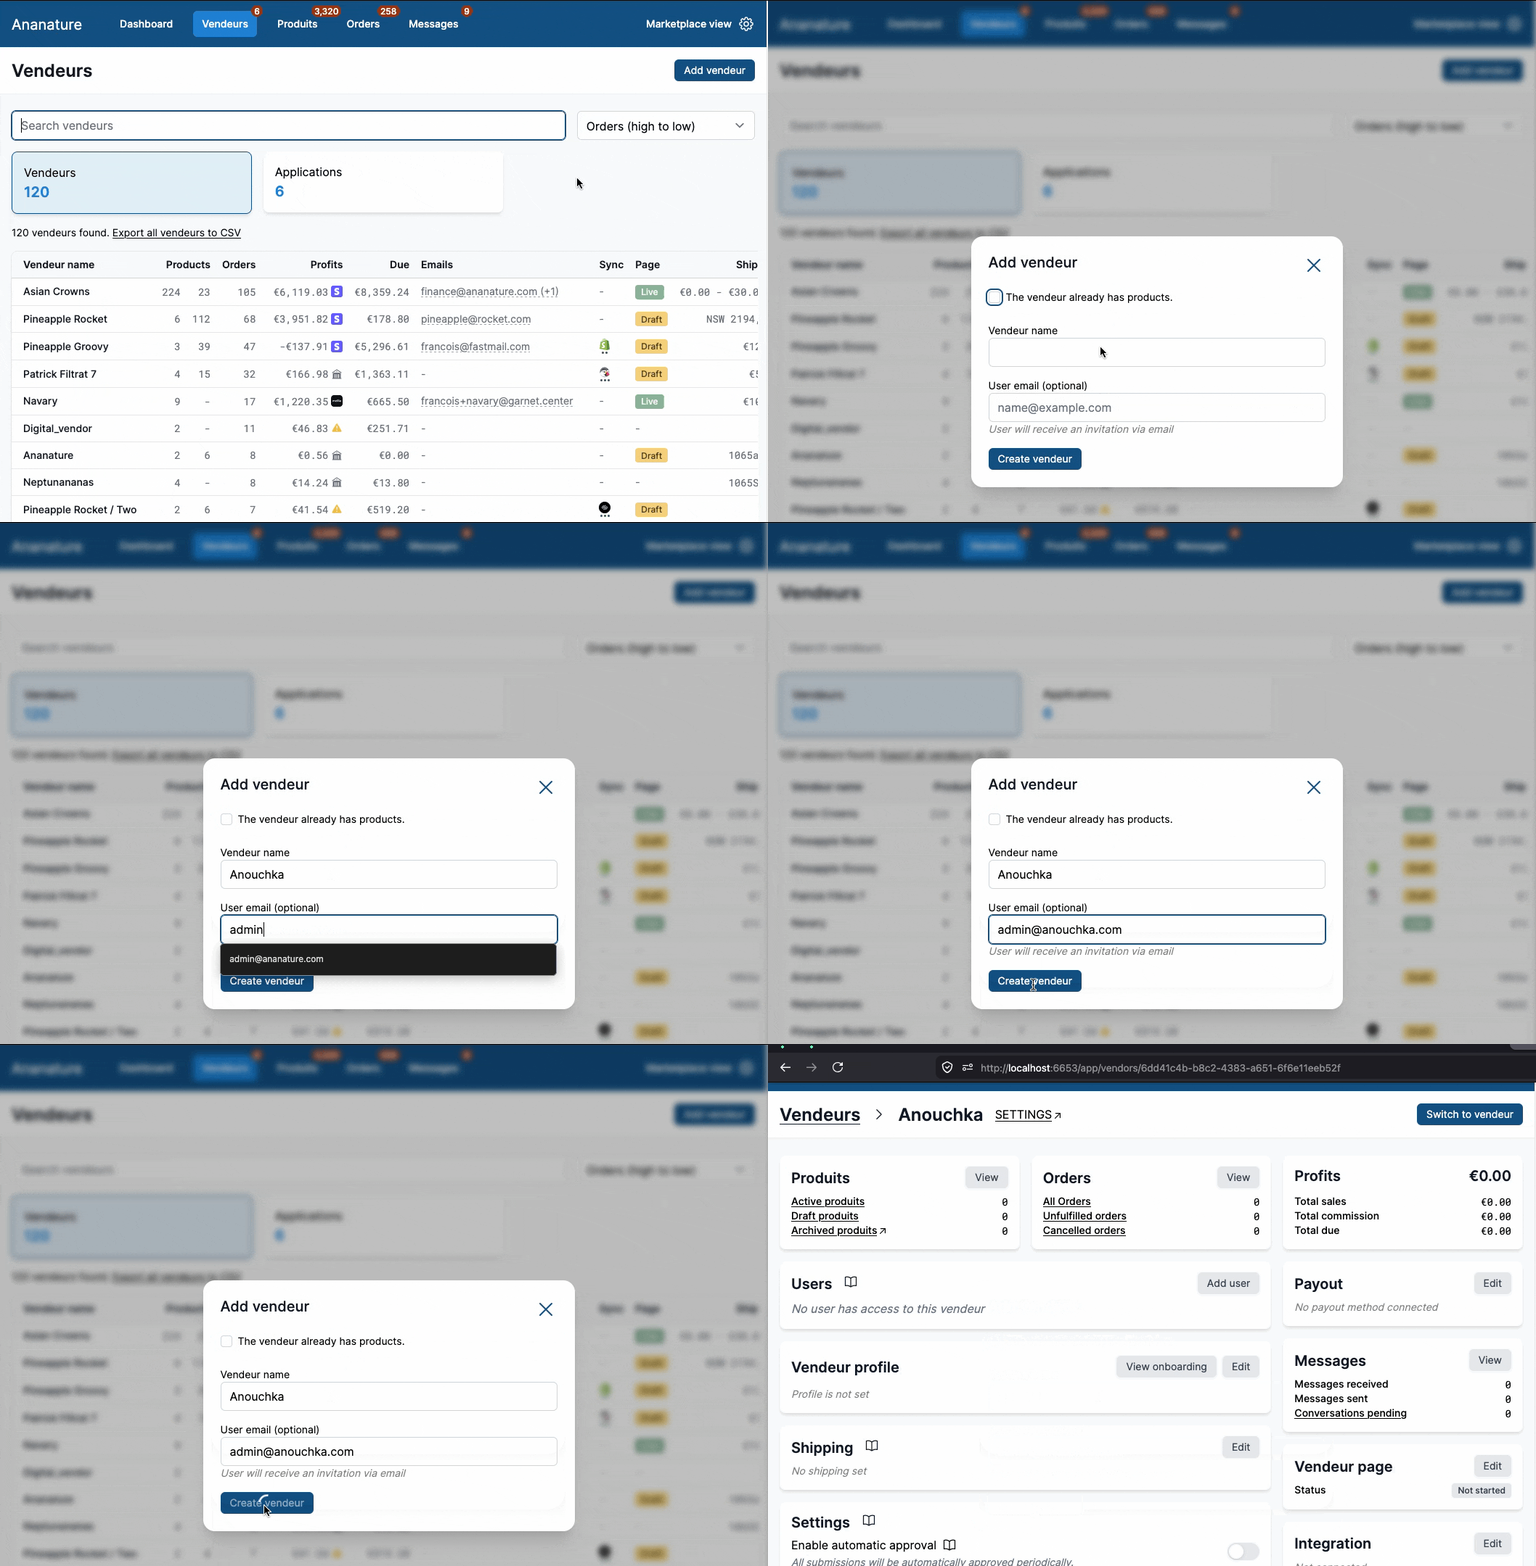
Navigate to Garnet > Vendors > Add vendor to add a vendor. Initially you only need to specify their name and optionally the first user email.
Later on you can edit vendor information, send invitation (below) to users, and see their profile.
You can also send them an onboarding link for them to fill the necessary information.
Add a vendor with existing products and orders
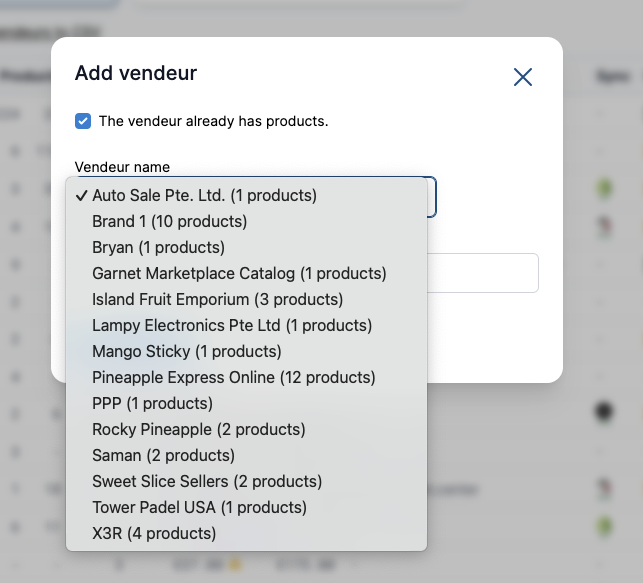
Is the vendor already selling on your marketplace? You can use an existing vendor by clicking The vendor already has products. The field will become a list of choices from existing vendors that do not have an account on your marketplace.
Add a user to a vendor
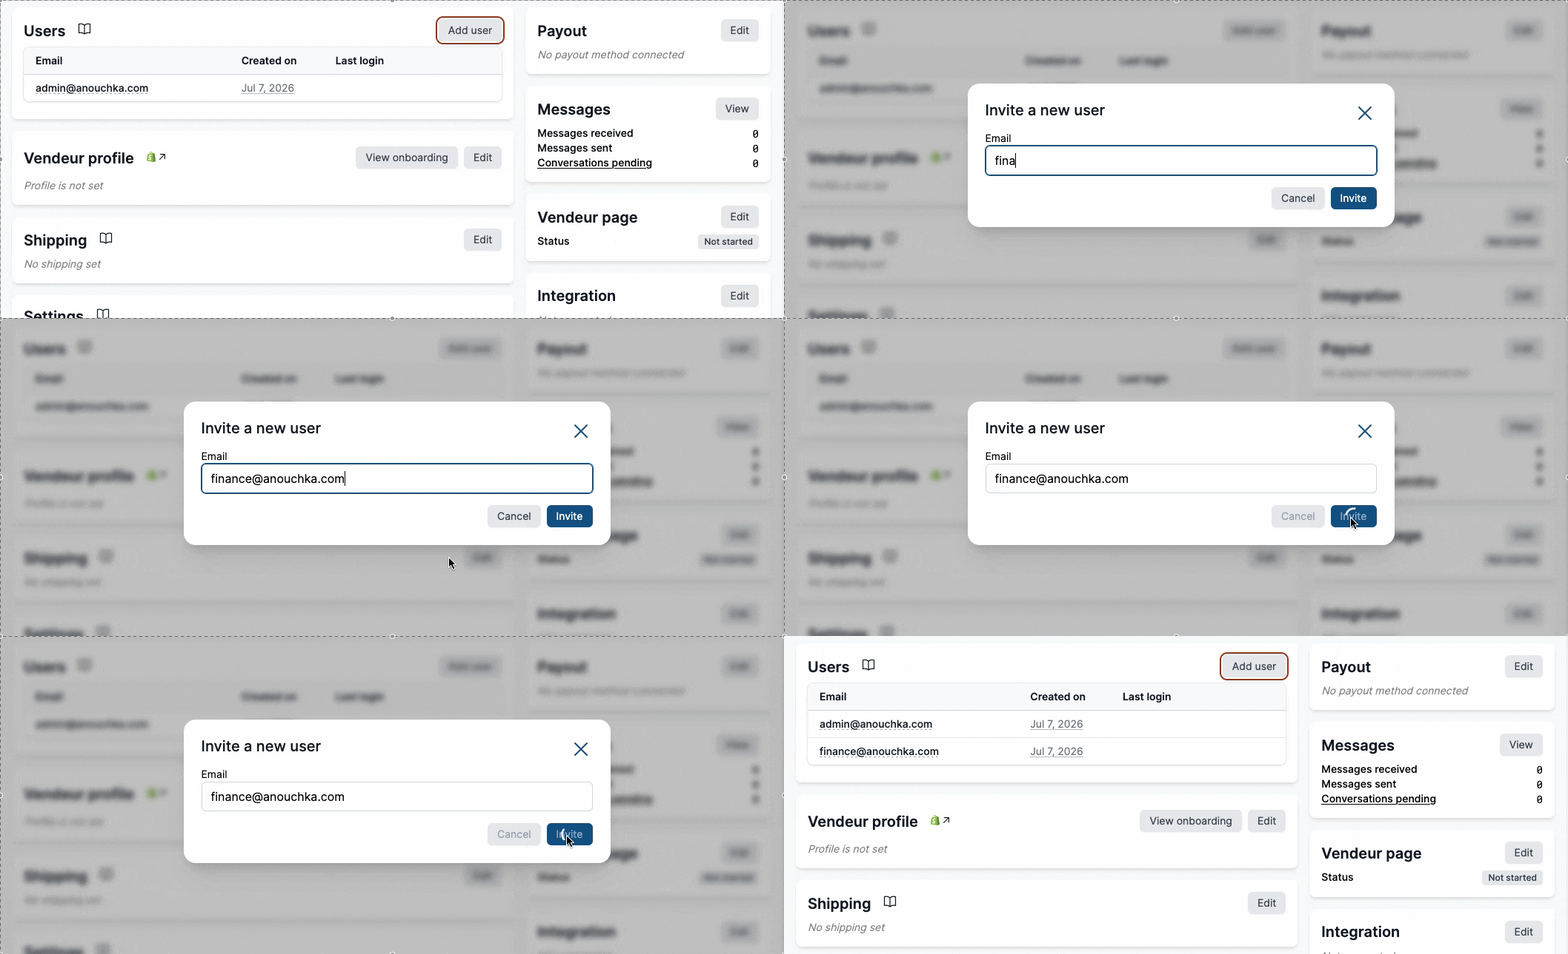
The vendor clicks the invitation link to create a password. Once the password is set, the vendor can access their Garnet Marketplace's account.
Manage a vendor's users
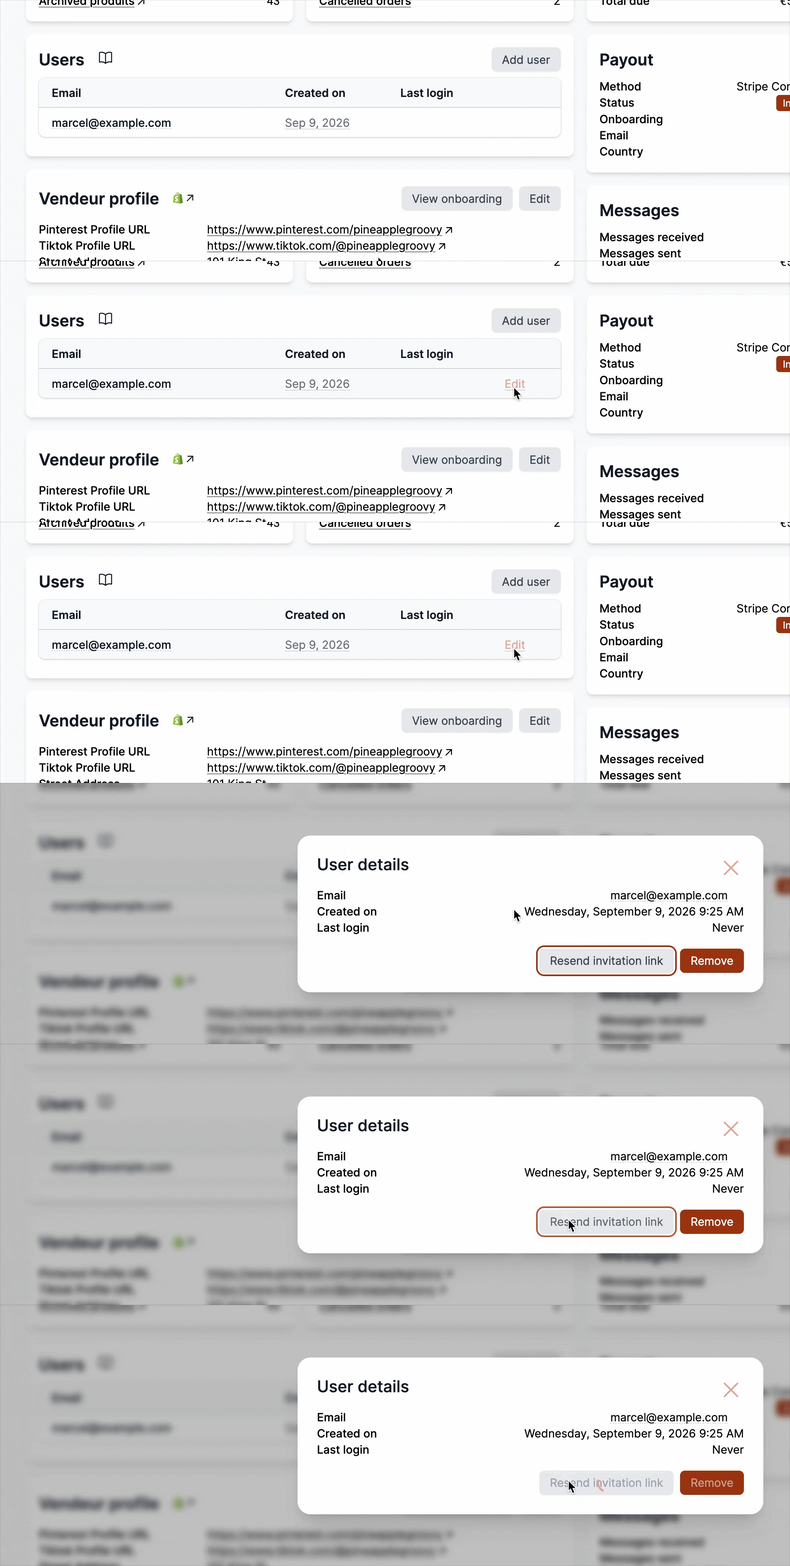
Under Garnet > Vendors > (vendor) > Users, hover a user and click Edit to open their details: email, creation date and last login (Never if they have not logged in yet). From there you can:
Resend invitation link: sends a fresh invitation email to the user. Use it when the first email never arrived, for instance because the sender email was misconfigured at the time, or when the link has expired.Remove: revokes the user's access to this vendor. Click twice to confirm.
Invitation expiry
Email invitations are valid for 14 days. The user can always reset their passwords to set their password if they misplaced the email or if the link is expired.
Email notifications templates
The email template can be customised in the Admin Panel > Vendors > Notifications or by using one of our email integration.
Vendor permissions
Contact us to set the user's permission to allow access only to specific tabs and actions. The vendor's manager user can invite other users without contacting the marketplace.