
Appearance
Vendor onboarding
Vendors can be invited with one link that will request all the necessary information for them to start selling.
This vendor onboarding is fully customizable and adapts based on your Garnet and Shopify settings. It is optimized for vendors to complete the onboarding without any distraction.
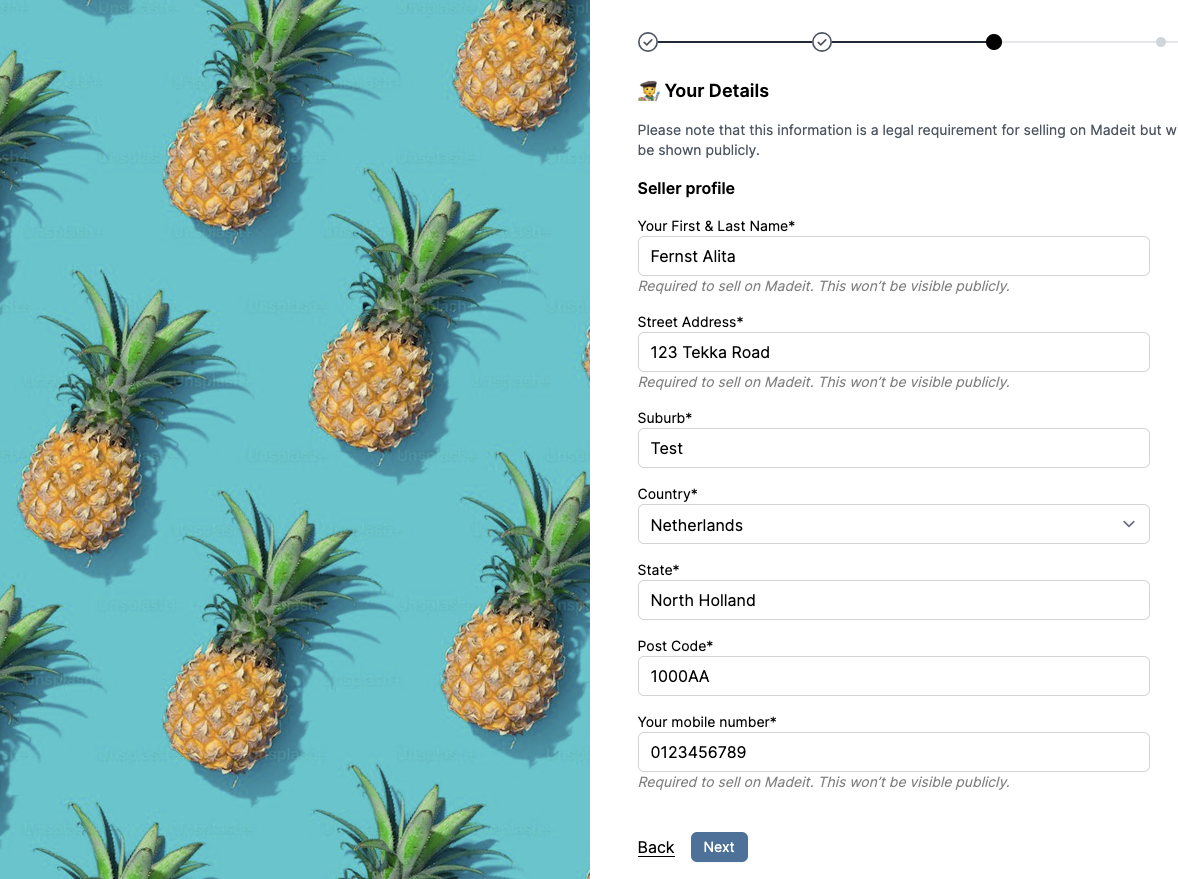
Vendors will have to complete the form to be able to sell on your marketplace.
Video demo, vendor perspective
Commented video where we show how it looks for a vendor to join the marketplace via the vendor onboarding.
Setup in Garnet
The onboarding steps can be configured in Garnet > Admin Panel > Vendors > Onboarding. Each section can be renamed, reordered, toggled on or off, and customized with its own image, description, and fields.
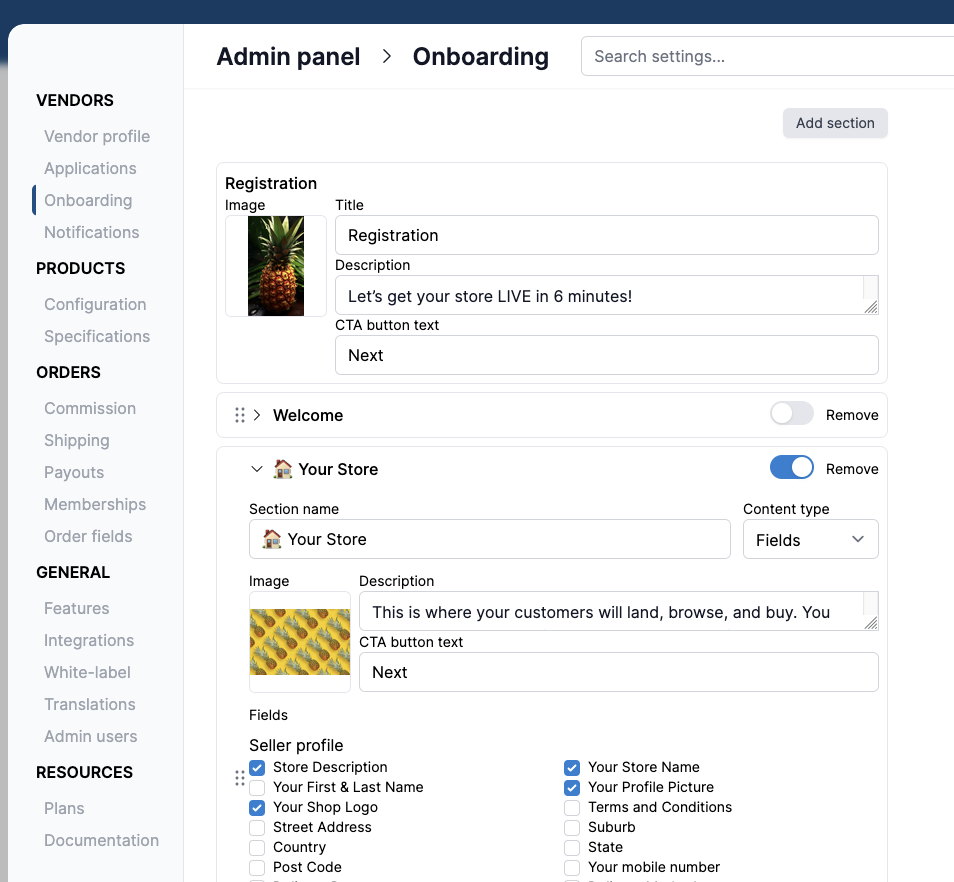
The first step named Registration is for the registration page (email, password, vendor name). It is the only mandatory page you have to fill. The logo used is the one from the white label settings.
Other steps can be customized as discussed below.
Common fields in all steps
There are 5 fields common to all steps:
Section name: title of the step, shown to the vendor and used in the progress breadcrumb.Content type: what the step asks the vendor, see the step types below.Image: illustration covering the left half of the page.Description: introduction text displayed under the step title.CTA button text: label of the button to go to the next step, defaults toNext.
Fields step
Asks the vendor to fill a selection of your vendor fields. Tick the fields you want to request in this step; they are grouped the same way as on the vendor page. Required fields must be filled before the vendor can continue, and answers are saved to the vendor profile.
Shipping step
Asks the vendor to define their flat shipping rates for each shipping zone. Zones are pre-filled with the marketplace default shipping rates until the vendor edits them. This step is available when flat rates or live rates are enabled.
Integration step
Shows the vendor the instructions to connect their own store (Shopify, WooCommerce, PrestaShop...) using their unique integration key. Once their store is connected, the step displays a confirmation instead. This step is available when integrations are enabled.
Membership step
Asks the vendor to subscribe to one of your membership plans and pay directly in the page with Stripe. Vendors with an active membership see a summary of their current plan instead. This step is available when memberships are enabled.
Payout step
Asks the vendor to connect a payout method so they can get paid. Once connected, the step shows Payout method connected. This step is available when Stripe, PayPal, or Mollie is enabled, see payout onboarding.
Force onboarding on login
Enable Force onboarding on login in Garnet > Admin Panel > Vendors > Onboarding to make the onboarding mandatory. Vendors who have not filled all the required fields are sent back to the onboarding form every time they open the app, and cannot browse the rest of Garnet until they complete it.
Only required fields block the vendor. Optional fields left empty do not keep them in the onboarding, so a vendor is never stuck on a step they cannot finish.
This applies to vendors only, the marketplace admin is never redirected.
View a vendor's onboarding status
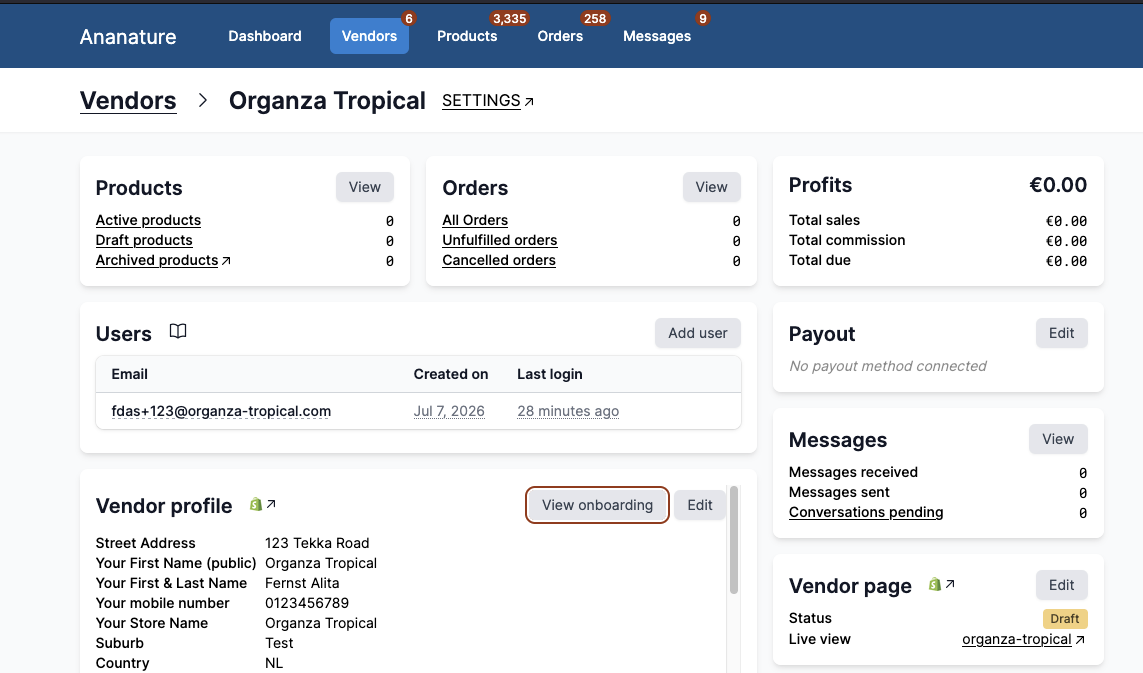
Open the vendor's page in Garnet > Vendors and click View onboarding in the Vendor profile card to see how far the vendor has progressed through the onboarding.
The marketplace can complete the onboarding on the vendor's behalf.
Email notifications
The vendor by default received a welcome email. The email template can be customised or diasbled in the Admin Panel > General > Notifications. Alternatively you can use one of our email integration to use your own tools.