
Appearance
Modern messaging setup
Modern messaging adds a floating, Messenger-style chat dock to every page of your store. Signed-in customers see a collapsed "Messaging" bar in the bottom-right corner; clicking it expands their conversation list, and selecting a conversation opens the chat in place — no page reload. It only shows for signed-in customers who already have at least one conversation.
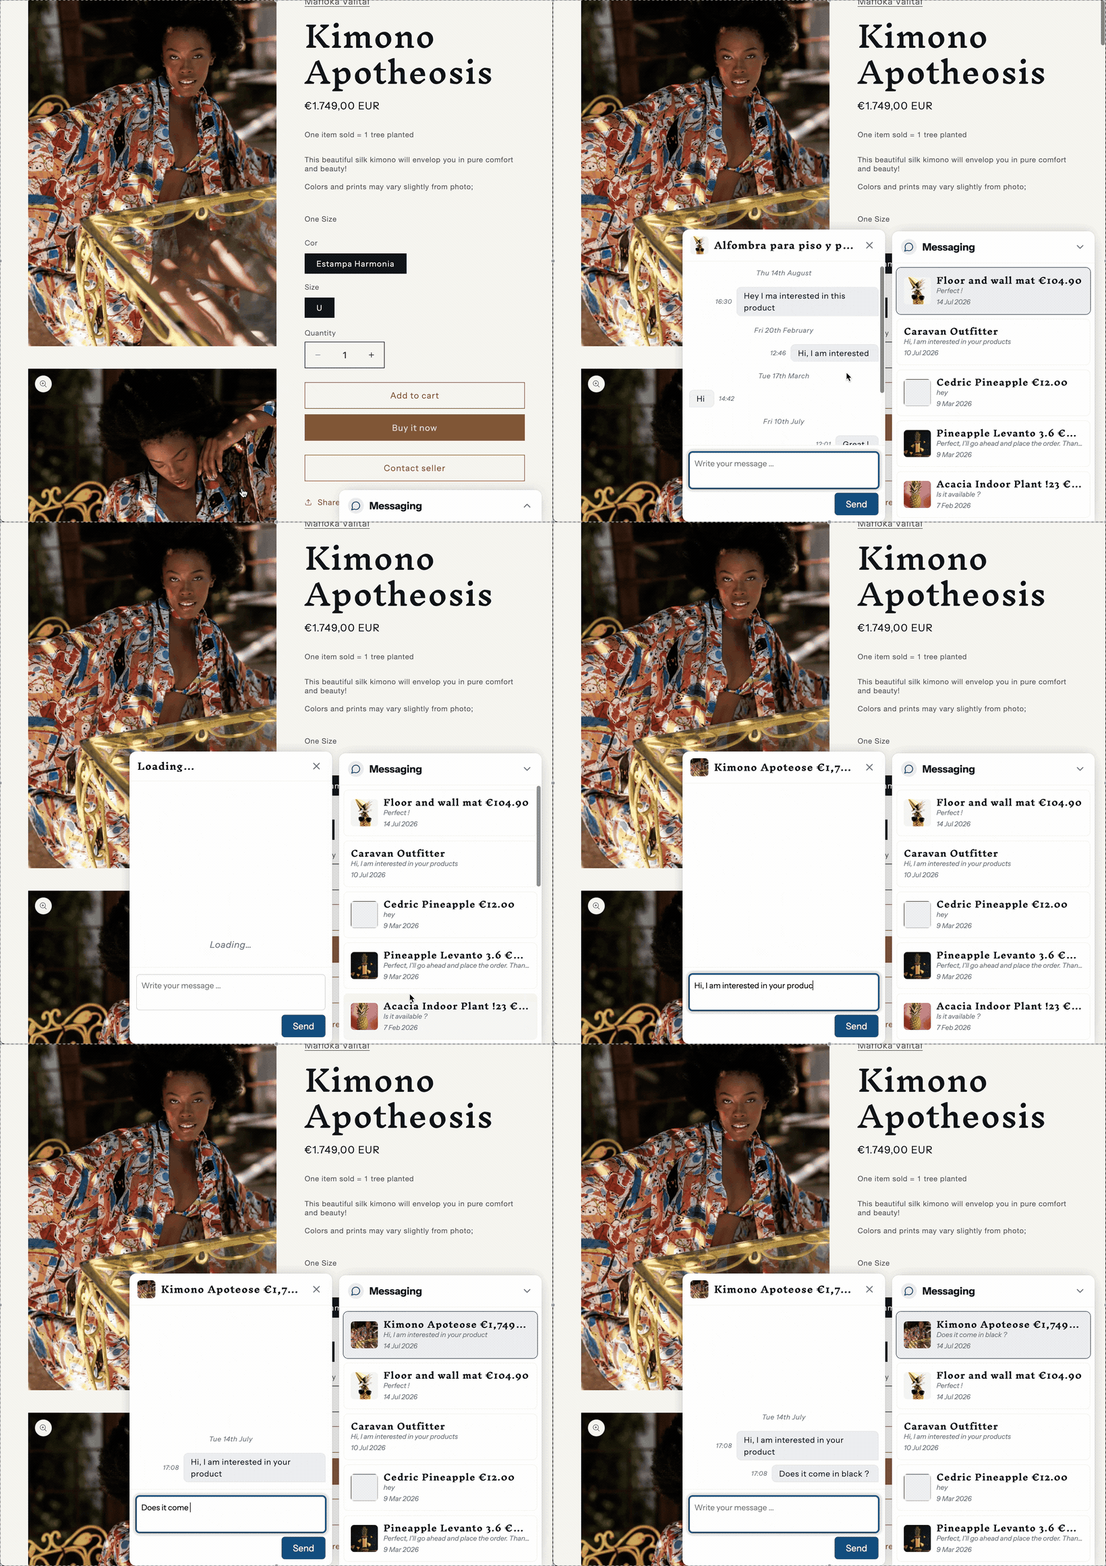
Unlike the classic messages page, this is an app embed: enable it once and it is available store-wide, so you don't need to create a dedicated messages page. A Contact seller button opens the widget in-page with that product's conversation instead of navigating away.
1. Turn on messaging
If you haven't already, enable the Messaging feature in Garnet > Admin Panel > Features. See the classic setup for details.
2. Enable the Messages Widget app embed
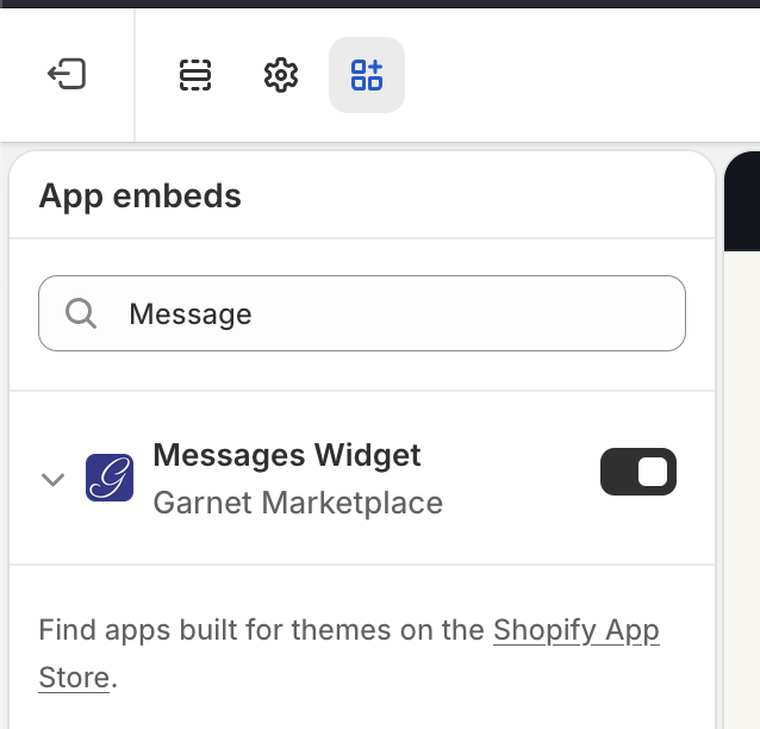
Unlike the other theme components, the Messages Widget is not a section you drag onto a page — it is an app embed you turn on from the theme editor's sidebar:
- Go to
Shopify admin > Online Store > Themes > Customize. - Open the
App embedstab (the puzzle-piece icon in the left sidebar). - Toggle on
Messages Widget, then clickSave.
You can customize the component with the following settings:
- Accent color: Buttons, highlights and icon tint. Leave empty to use your Garnet theme color.
- Widget label: The text shown on the collapsed messaging bar. Default:
Messaging. - Message placeholder: The placeholder text shown in the empty message input.
3. Add the Contact seller button
Add the Contact seller theme component to your product pages just like in the classic setup. When the Messages Widget is enabled, the button opens the floating widget in-page with that product's conversation instead of navigating to a dedicated page.