Appearance
Classic messaging setup
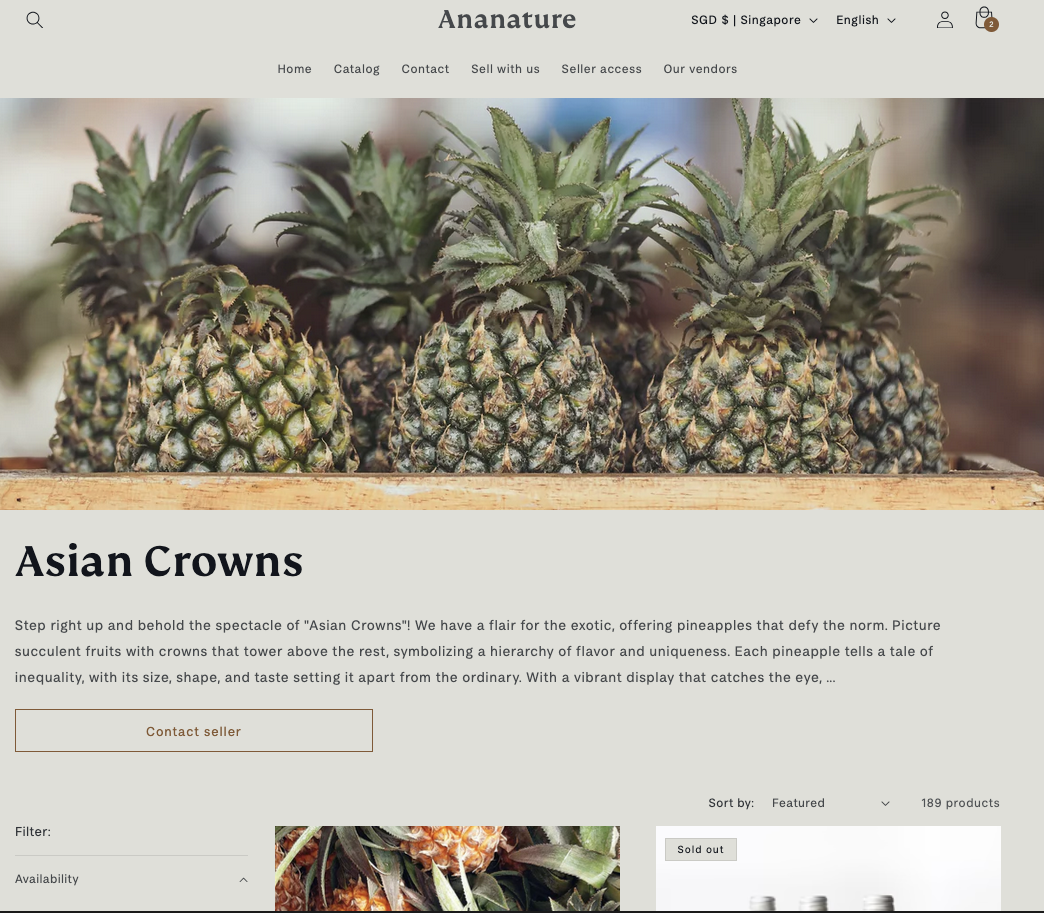
Classic messaging gives your customers a dedicated messages page on your storefront, plus a Contact seller button on product and vendor pages. Clicking it opens a full-page conversation view where customers chat with the vendor.
Prefer a floating, Messenger-style chat that appears on every page and opens in place? See the modern messaging setup instead.
The messaging widget is a theme component that can be placed anywhere.
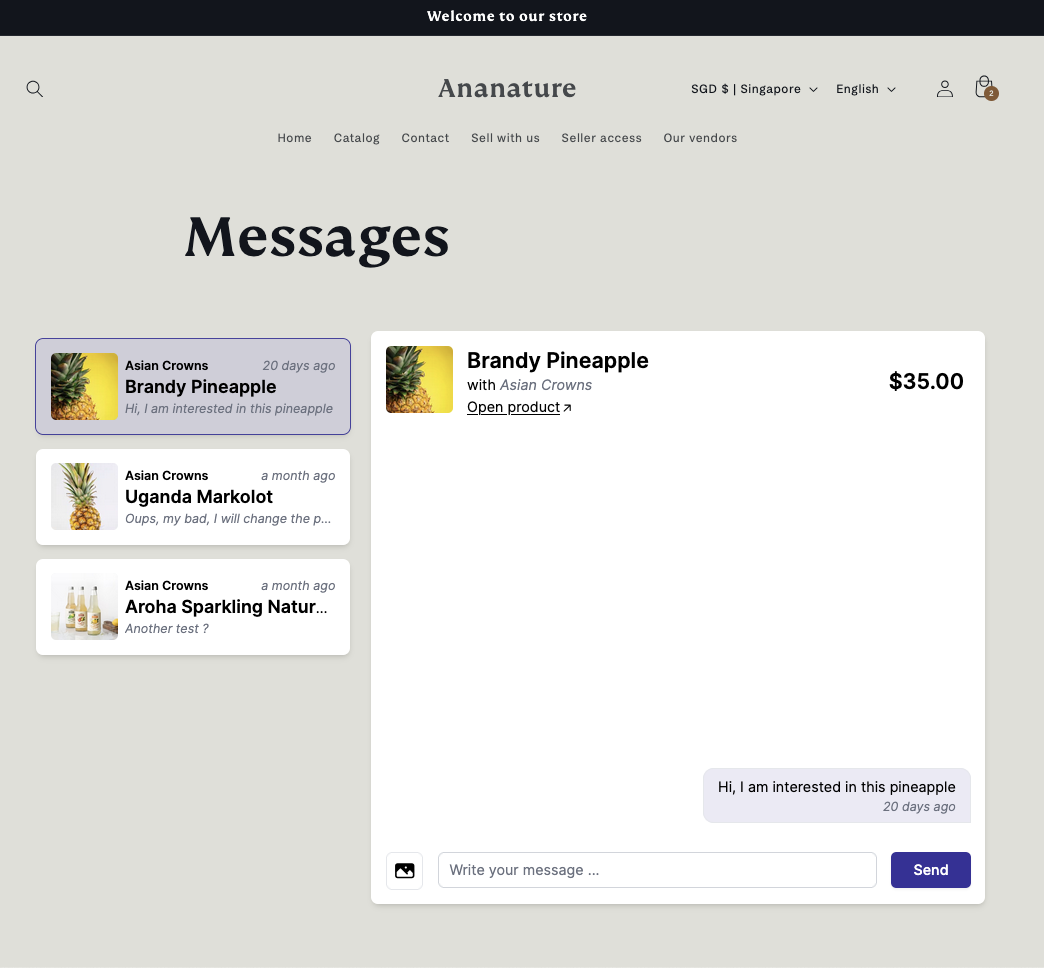
Garnet Marketplace messaging inside a Shopify page.
Quick demonstration
Explore what it looks like as a customer and as a vendor to send and receive a message.
Features
- The messaging widget is embedded in your store.
- Users can send text and images in real-time.
- Customer must have an account on Shopify and be connected.
- If a customer does not have an account, the button redirects to the login page.
- The vendor must have a Garnet account.
- If a message is missed, an email will be sent to the user that did not read the message.
1. Turn on messaging
To get started, enable the Messaging feature in Garnet > Admin Panel > Features.
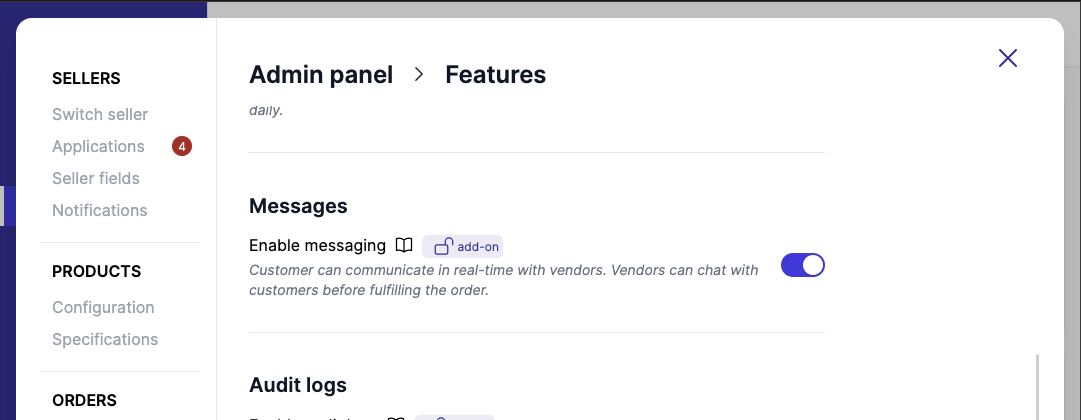
Immediate effects:
- Vendors have a new tab containing their messages.
- Vendors can message registered customers from the order view.
2. Add the messaging page
Navigate to your store Shopify > Online Store > Themes and Customize your theme. Then create a new page template named messages.
Then add the theme component [beta] Customer Messages. It works out of the box, but two settings let you adjust it:
- Container width: The maximum width of the messages area, as any CSS length (e.g.
1200pxor100%). The area always stays centered on the page. - Custom domain: Leave this blank unless your store serves the Garnet app from a custom domain (e.g.
vendors.mystore.com). If it does, enter that domain here so the messages load from the right place.
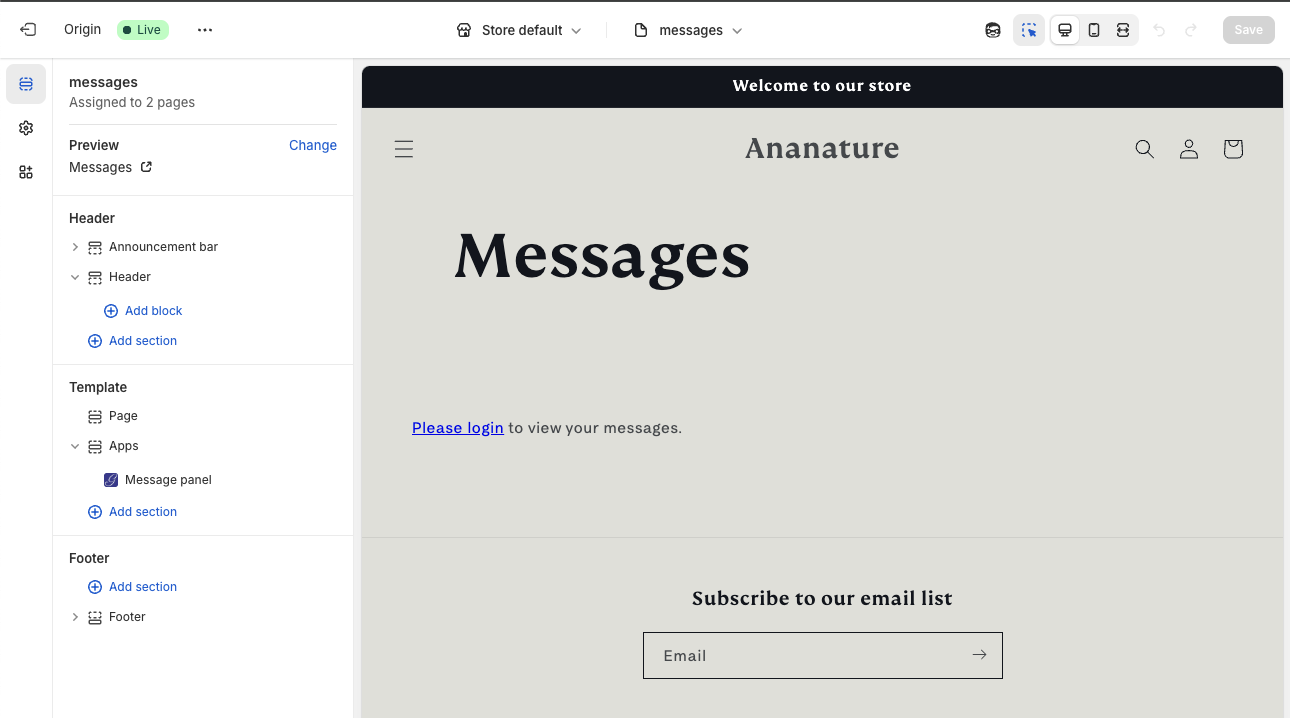
Then we'll create a Shopify page using this template. Navigate to Shopify > Online Store > Pages and create a new page named Messages. Ensure that the page template is messages (created earlier).
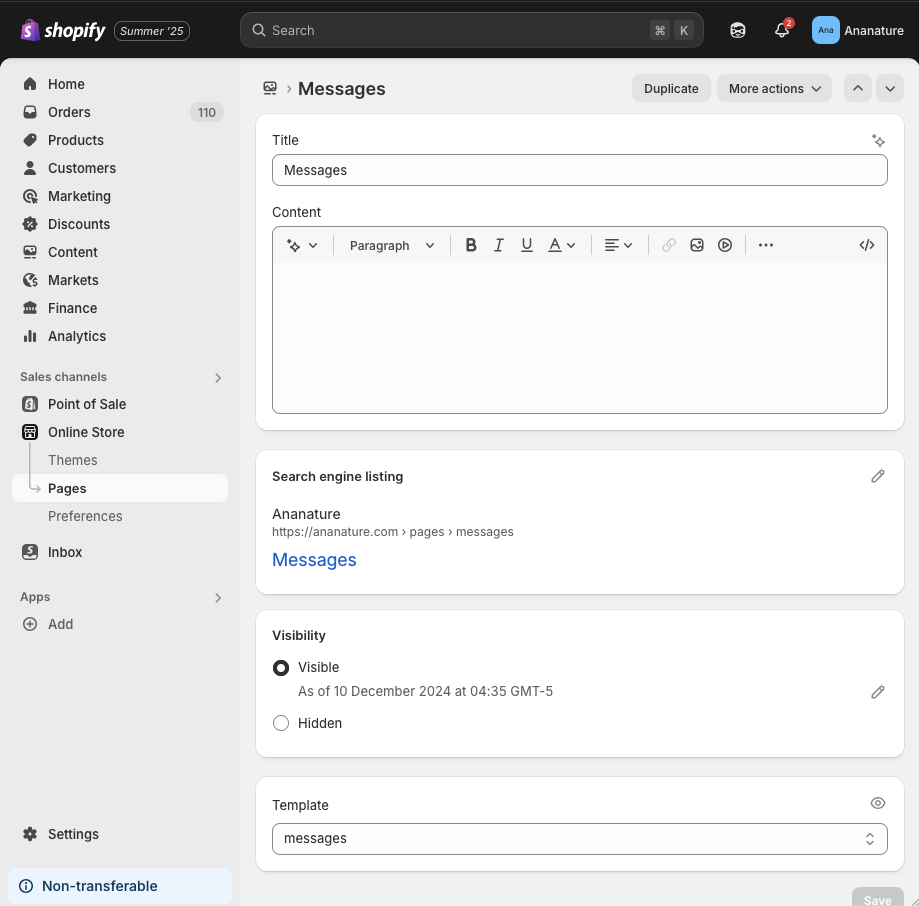
That's it! You now have a page where logged-in customers can see their messages!
3. Add the Contact seller button
Navigate to your store Shopify > Online Store > Themes and Customize your theme. Then access the product page template you want to edit.
There, add the theme component named Contact seller. Usually, we place it below the Add to cart buttons.
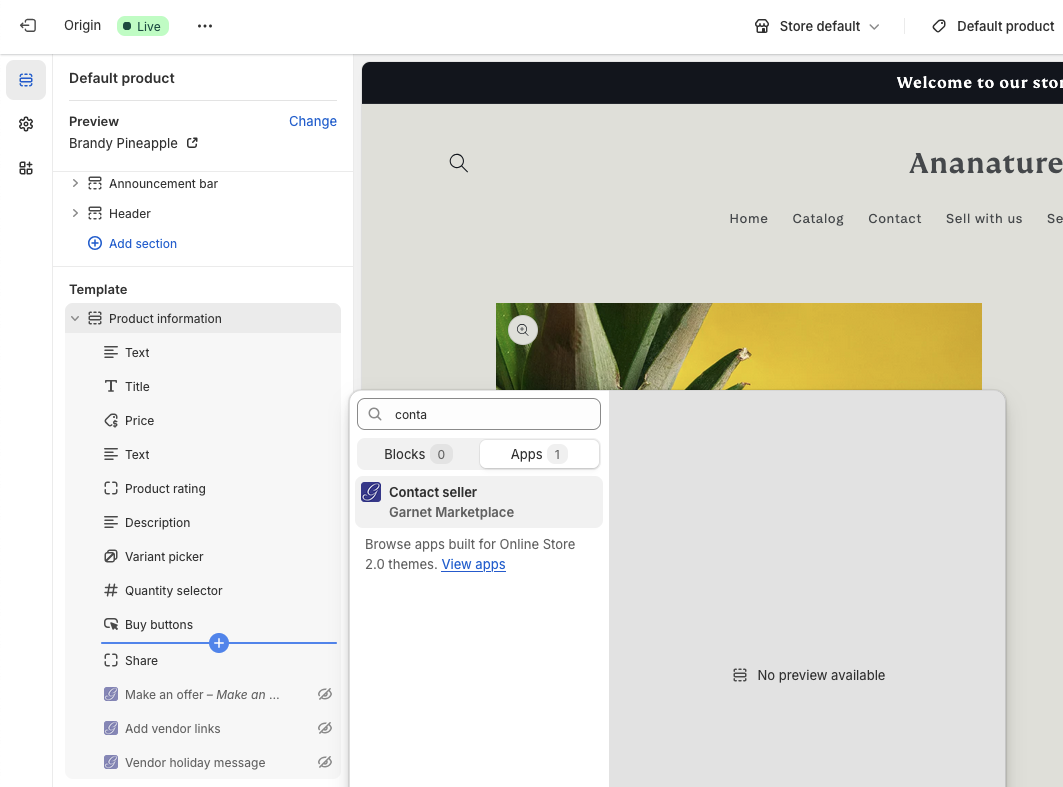
You can customize the design of the button by changing its style and classes.
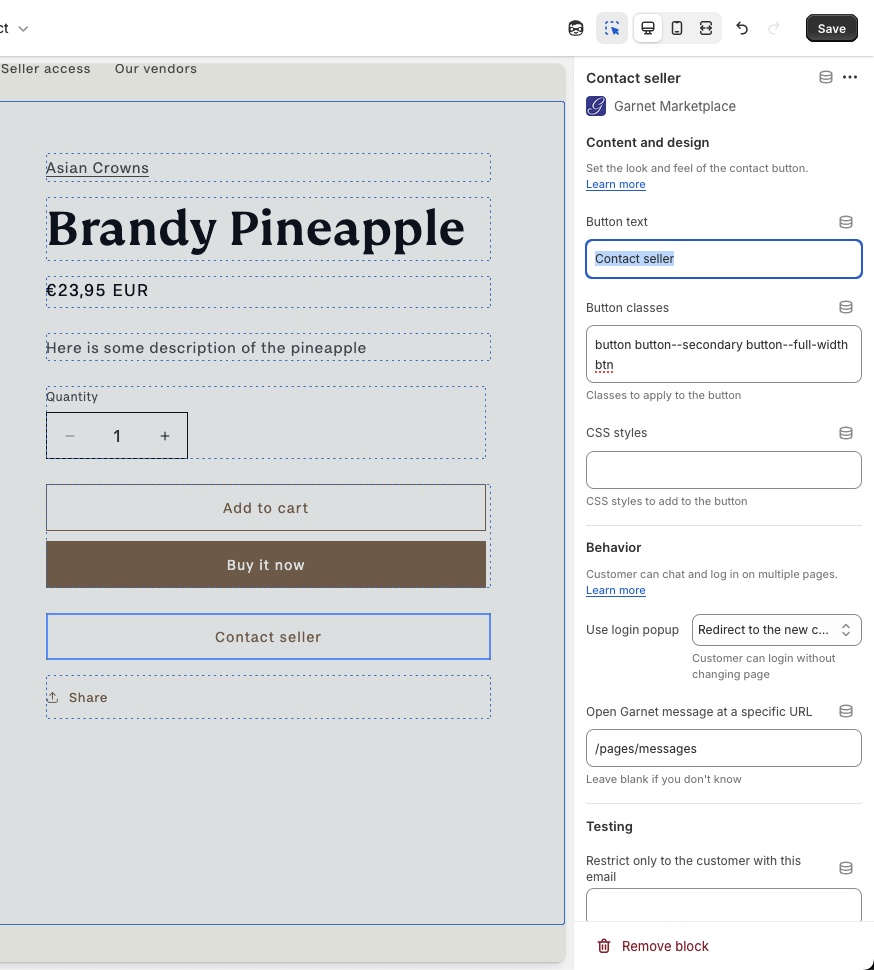
You have several configuration options available:
- Use login popup: Whether to use a custom popup to login or to use Shopify's new customer page. If you are unsure, use the new customer page (default).
- Open Garnet messages at a specific URL: Must be the relative URL of the message page created in step 2. For example, it can be
/pages/messages. - Testing: Show the widget only to one customer with a specific email. This is used for testing.
Start a conversation
From a product
Customers can start a conversation directly from a product using the Contact seller button. The conversation is linked to the product, so both the vendor and the customer get easy access to the product link and price inside the chat.
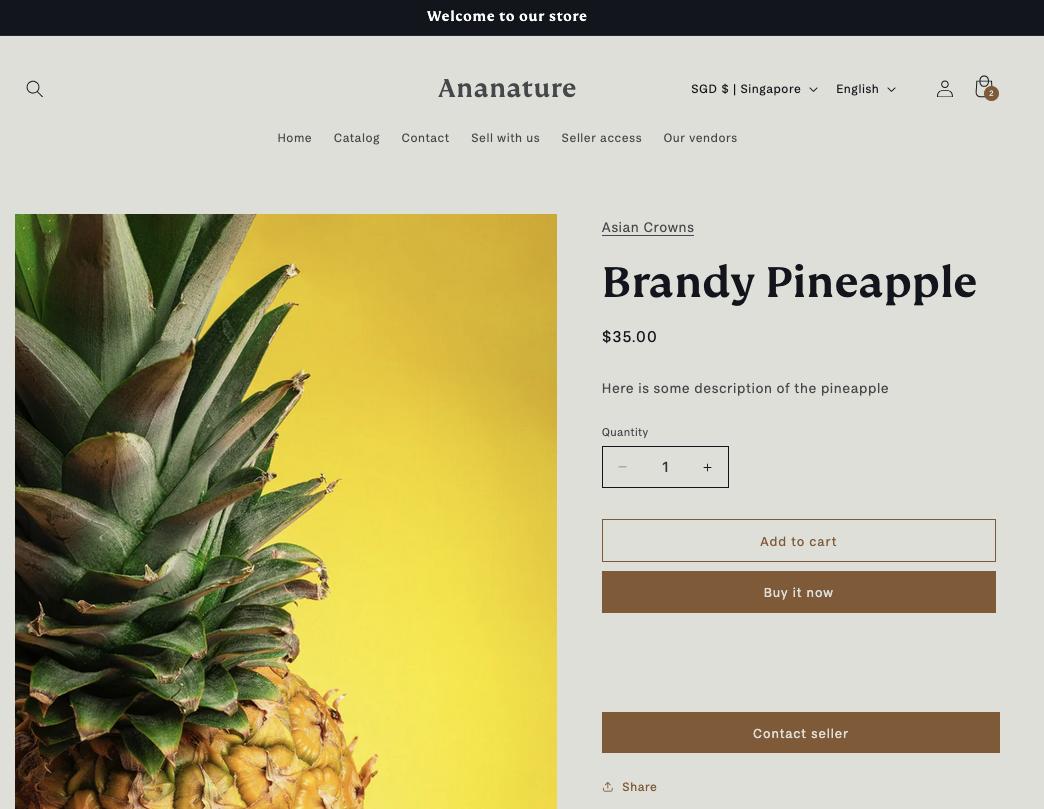
Note the
Contact sellerbutton customized with the website's colors.
From a vendor page
Paired with the vendor page feature, the marketplace can add a Contact seller button on the vendor page.