
Appearance
Airwallex integration
Work in progress
Vendors can connect their Airwallex account, but payouts are not sent automatically yet — you still settle them outside Garnet and mark the orders as paid. Contact us if you need help setting up Airwallex.
Register as a platform first
An ordinary Airwallex account cannot open accounts on behalf of other businesses. Before anything below will work, your account has to be registered as a platform — through the sign-up form or by contacting Airwallex — and pass their compliance review. Ask your account manager for:
- Connected accounts enabled for the entity types your vendors are (businesses, individuals, or both)
- A hosted onboarding template ID, which decides the steps your vendors go through
Without this, Garnet gets This account cannot onboard business accounts the first time a vendor tries to connect, however the API key is set up.
Create an API key
- Log in to your Airwallex account
- Go to
Settings > Developer(direct link) - Click
Manage API keys - Click
New scoped API key - Name the API key
Garnet Marketplace - Under
Account permissions > Accounts, select your account - Enable the following permissions:
| Section | Resource | Access | Purpose |
|---|---|---|---|
| Scale | Connected Accounts | Read + Write | Create and manage vendor accounts |
| Scale | Hosted Flows | Read + Write | Open the onboarding pages for a vendor |
| Scale | Transfers | Read + Write | Transfer funds to connected accounts |
| Payouts | Beneficiaries | Read + Write | Create and verify vendor bank accounts |
| Payouts | Transfers | Read + Write | Execute payouts to vendors and check status |
| Webhooks | Webhooks | Read + Write | Receive event notifications |
See the full list of available scopes for more details.
- Once the API key is created, copy the
Client IDandAPI key - In Garnet, go to
Admin Panel > Finance > Payout methods > Airwallex integrationand paste them, along with the onboarding template ID from your account manager:
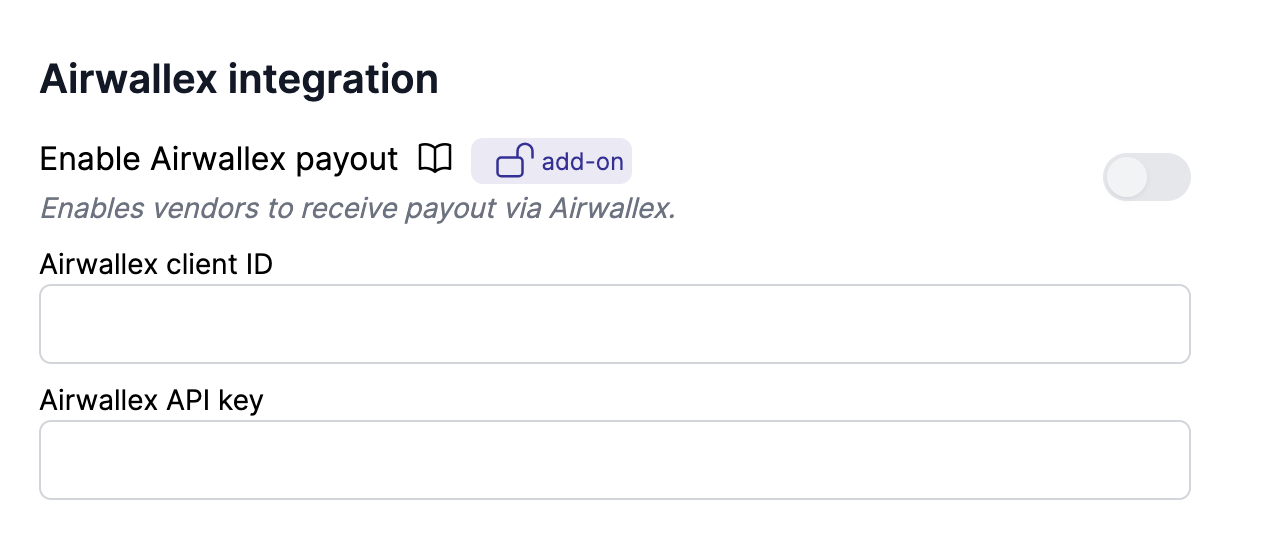
How vendors connect
Once the API key is saved, Via Airwallex shows up for your vendors in Garnet > Settings > Payment.
- The vendor picks
Via Airwallexand clicksContinue - Garnet creates a connected account for them under your Airwallex account, named after the vendor
- Airwallex opens in a new tab and asks for everything it needs to verify them — whether they trade as a business or an individual, their address, registration number and owners. Garnet never sees or stores those details
- Airwallex sends them back to
Settings > Paymentat the end, where the account shows as connected, and the Airwallex logo appears next to them inAdmin Panel > Vendors
Airwallex reviews the submission afterwards and may come back to the vendor with a request for more information. Until the review passes, the account exists but cannot receive funds.